1H41025.png

In-Camera B&W Infrared Photos Made Easy (VIDEO)

We’re all looking for new ways to expand our repertoire and b&w infrared (IR) photography is a great technique for capturing awe-inspiring images with an otherworldly look. Today’s quick tutorial with instructor Richard Herzog demonstrates how easy it is to get the job done in the camera.

The magic behind this method occurs because IR photography captures the invisible infrared light spectrum to create captivating imagery with high contrast. As a result, your photographs will be imbued with a distinctive effect whereby foliage on trees, leaves, and grass appear bright white in a surreal way. You’ll also notice dramatic separation between clouds and the surrounding sky.

All you need is the appropriate lens filter and a firm grasp of how to use it. Herzog is an adept pro whose passion for photography developed at an early age while watching his grandfather shoot with a basic Polaroid camera. Over the years he developed his skills, opened a studio in Arizona, and made photography his career.

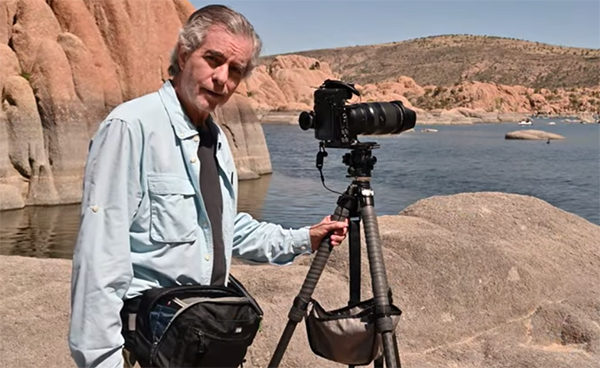
Today’s behind-the-scenes episode takes place in Watson Lake, AZ where Herzog is surrounded by impressive boulders and the lake in the middle of the frame. He begins by mounting an IR filter on his lens. Fortunately he locates a tree within the scene because a green element is very important. There’s a list of the filters Herzog prefers in the description beneath the video.

The first big consideration is this: “The infrared focusing spectrum is different from the visual spectrum, so we have to put the filter on and then focus manually.” That’s because the camera’s AF system will get things wrong. The trick involves using Focus Peaking to identify the precise spot on which to focus.

Herzog also has some interesting suggestions for adjusting exposure both before and after you trip the shutter. Exposures tend to be long when making IR images, and he explains that you don’t want to boost your ISO setting too far, otherwise image noise rears its ugly head. He limits himself to ISO 500 or lower.

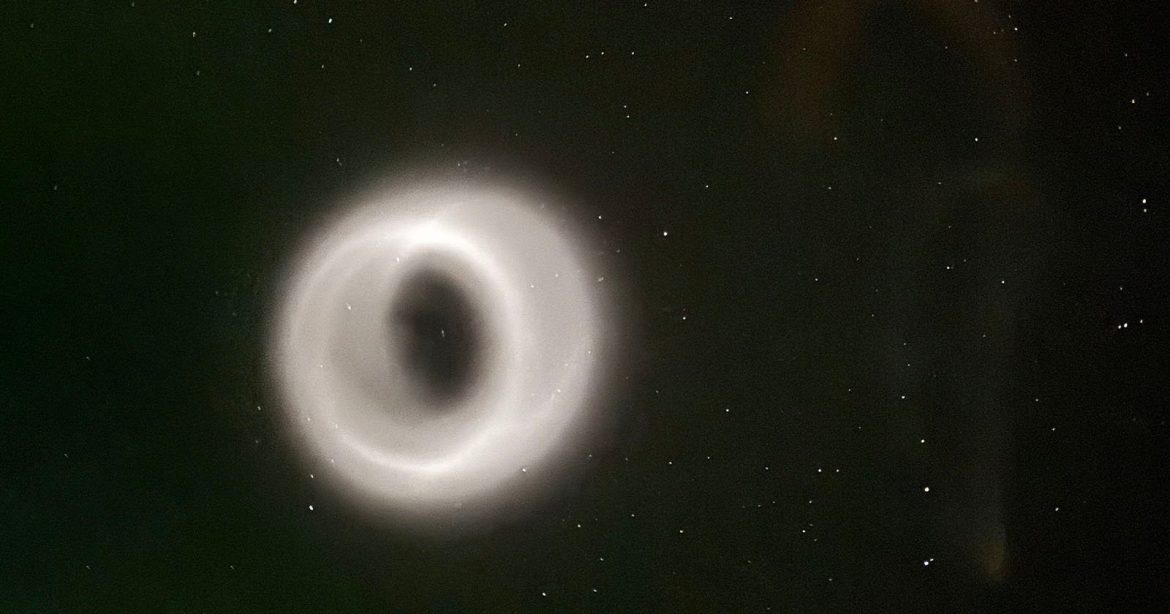
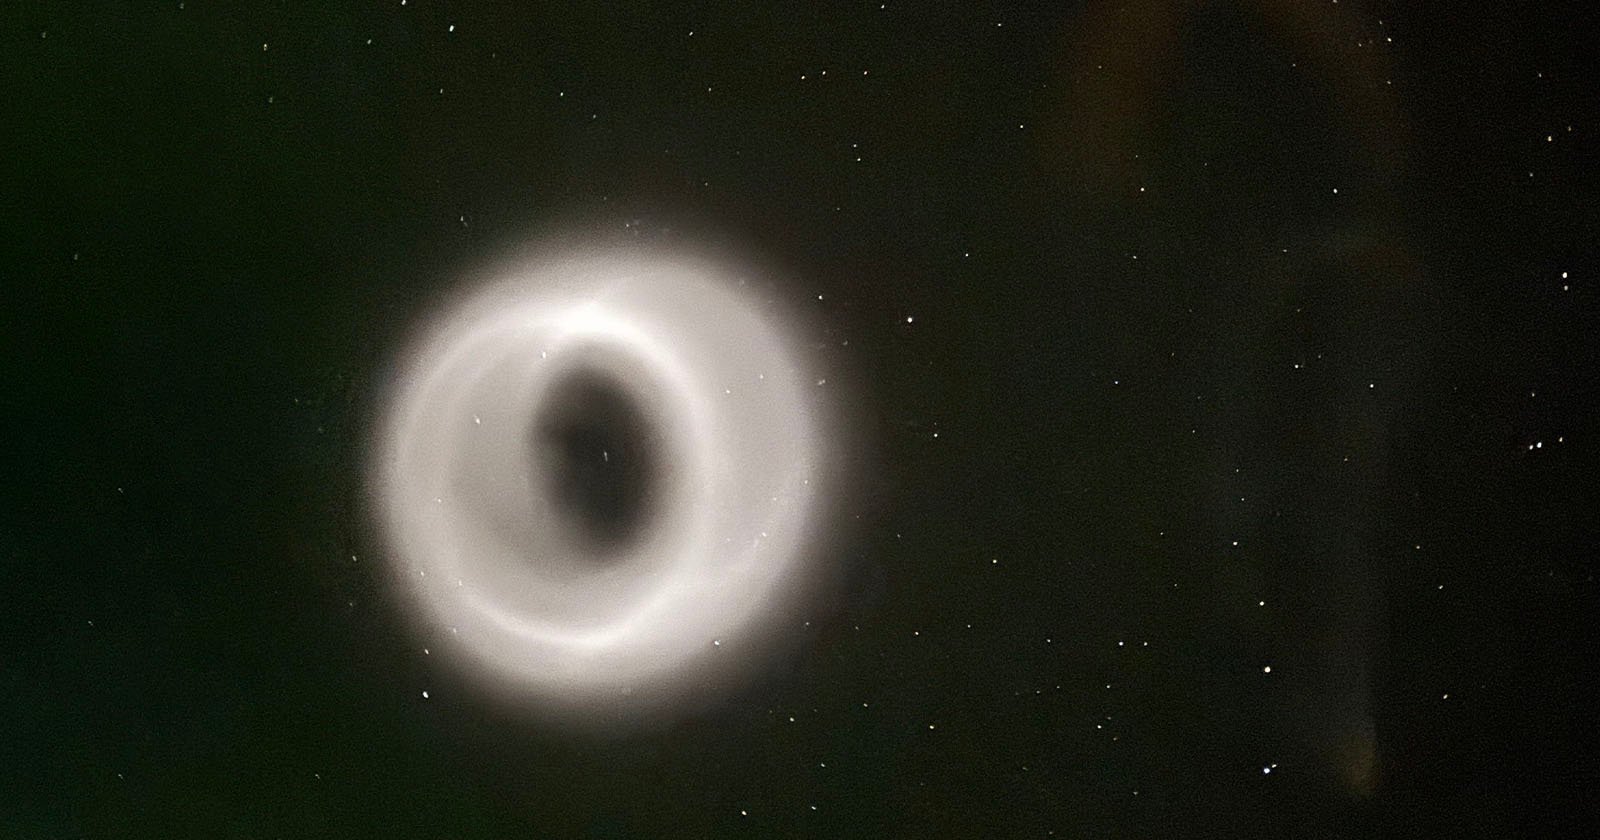
You’ll see how Herzog experiments with exposure times of 30 seconds to two minutes—hence the need for a sturdy tripod. There’s more to be gleaned as the four-minute tutorial proceeds, culminating with Herzog’s exceptional final image.

There are many more valuable tips and techniques to be found on Herzog’s instructional YouTube channel.

And don’t miss the recent explainer we featured earlier with a beginners guide to Exposure Bracketing that demonstrates everything you need to know about camera settings and post-processing techniques for perfect exposures when shooting outdoors in complicated light.

1CM41025.png

Why You Should Use Photoshop's Adjustment Layers to Fine-Tune Your Edits (VIDEO)

This tutorial from the PHLOG Photography YouTube channel is different from others they share that typically take a deep dive into a single technique from beginning to end. Instead, the goal of today’s episode is to provide an overview of Adjustment Layers in general and demonstrate why they should play a prominent role in your everyday Photoshop workflow.

Instructor Christian Mohrle is one of Germany’s finest landscape photographers, and his post-processing videos are second to none. This 10-minute episode describes the concept behind Photoshop’s Adjustment Layers, where they’re located within the workspace, the different enhancements they enable you to make with precision, and the best ways to use them.

While Mohrle doesn’t concentrate on any one specific technique he does share his five favorite Adjustment Layers which include Photo Filter, Gradient Map, Levels, Color Balance, and Selective Color. He puts it like this: “Adjustment Layers are a great way to add some final retouching on your images. I love using them as a last step in my editing process to apply very fine, distinct changes.”

Mohrle provides an overview of how these layers can enhance colors and tones without changing pixel value. In other words, these are non-destructive adjustments. This means you have plenty of freedom to experiment with the changes until you’re completely satisfied with the outcome.

You’ll find a variety of icons near the bottom of Photoshop’s Layer panel. Mohrle shows you where to click to access the tools which are divided into groups. Mohrle explains why the upper options are of less interest to landscape photographers. The lower group is where things get interesting because “here we have the Adjustment Layers affecting the tones of your images that can be used to change brightness and contrast.”

Then there’s s bunch of Adjustment Layers targeting colors that enable you to change saturation, specific colors, and overall color balance. The remainder of the 10-minute video is devoted to exactly how Mohrle’s five favorite Adjustment Layers work, and you may find that this handful of techniques is all you really need.

After the video concludes be sure to check out the popular PHLOG Photography YouTube channel where there are many more instructional videos for anyone who shoots in the great outdoors and wants to edit their photos to perfection.

We also recommend watching another helpful tutorial we posted recently in which a successful British landscape photographer demonstrates three “secret tricks” that anyone can use to capture super-sharp images with any camera and lens.

OM-System-Outdoor-Monster-Curry-Review-Bringing-the-Delicious-Heat.jpg

OM System Outdoor Monster Curry Review: Bringing the Delicious Heat

A camera lens and a box labeled "OM System Curry" are placed on a windowsill. The background shows a blurred cityscape, while the foreground features a "PetaPixel Reviews" banner.

In the camera review game, the continuous grind of lens and camera reviews can get a little monotonous sometimes. But every once in a while, a product comes along that is so innovative and so outside the box that you can’t help but stand in awe. Outdoor Monster represents a moment exactly like this and I had the privilege to test it out for myself.

[Read More]