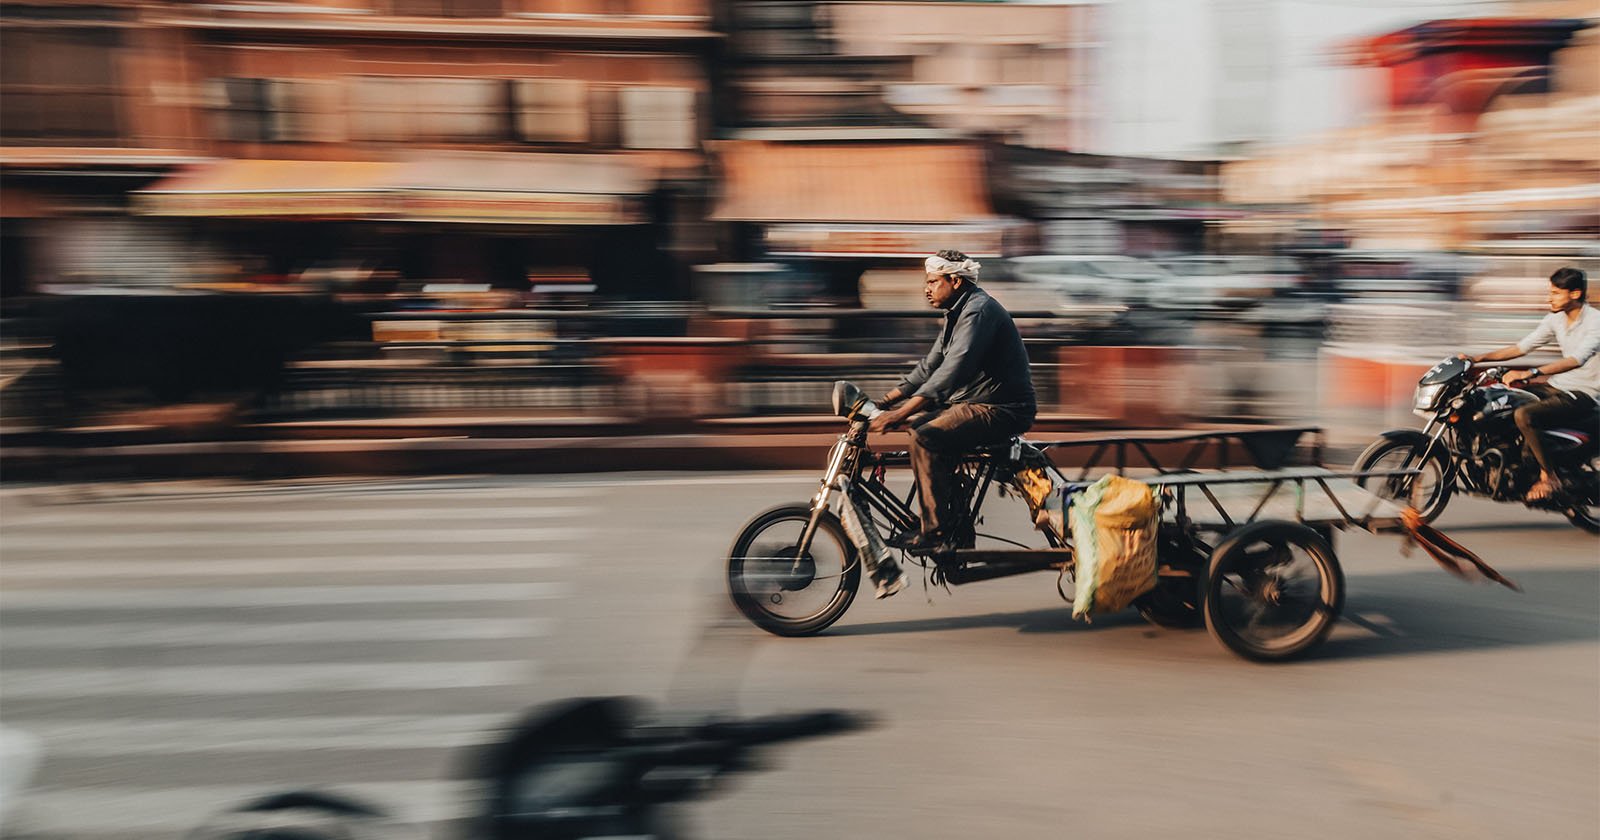
As Canon Ambassador, I traveled to India with a pre-released Camera EOS R50 V. This is how it coped with busy streets, poor lighting, and breathtaking vistas.
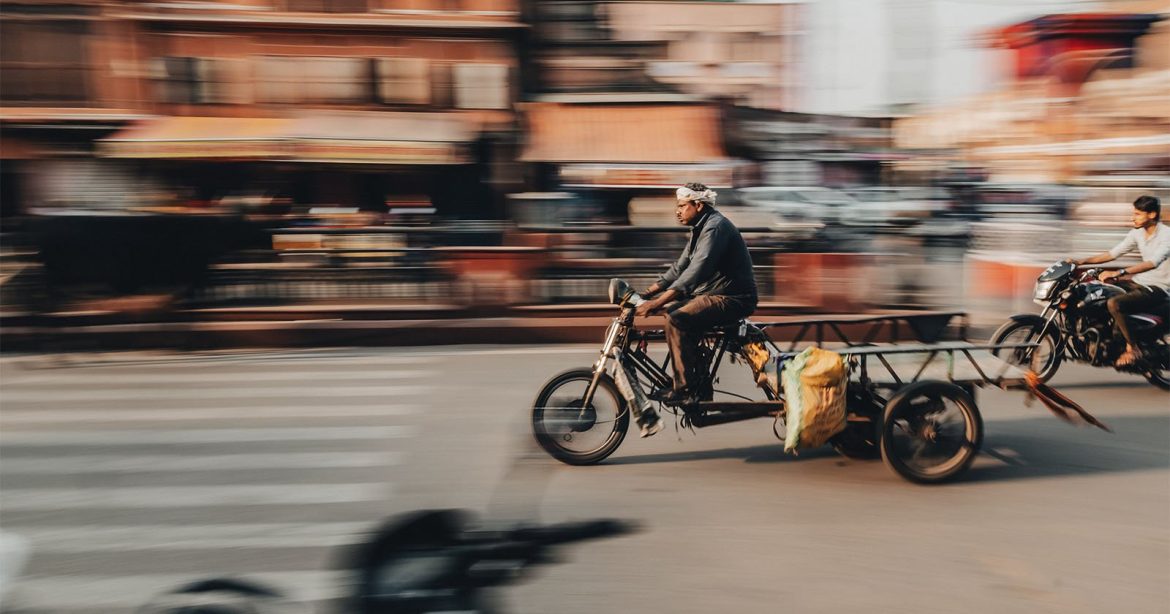
As Canon Ambassador, I traveled to India with a pre-released Camera EOS R50 V. This is how it coped with busy streets, poor lighting, and breathtaking vistas.


The PowerShot name belonged to some of the best Canon compact digital cameras ever made but it has faded into obscurity of late. However, in the spirit of excellent cameras such as the Canon PowerShot G1X, we now see a return to the storied lineup. The $900 Canon PowerShot V1 has arrived and this latest vlogging camera has everything charming and powerful about its predecessors.

The task of accurately setting the white and black points during post processing refers to adjusting the brightest and darkest tonal values of a photograph to achieve a full range of tones from pure white to pure black. This tutorial from the Photo Masters YouTube channel explains how to get the job done for perfectly balanced images.
Instructor Ian Plant is a prominent member of the Photo Masters community of creative photographers that connects passionate enthusiasts with tops pros. In this eight minute episode he describes the topic at hand and illustrates the benefits you’ll receive. Plant also provide this spoiler alert: “I actually don’t think it’s always a good idea to do this.”
Plant describes the basics of the technique, and you’ll have a better understanding by observing him go through the motions while watching his examples. Simply put, setting the white point involves taking the brightest part of an image and setting it to pure white or just shy of this level. As you might surmise, the reverse is true when specifying the black point.

He illustrates this process with an image of rolling sand dunes captured in Death Valley. Pay close attention to the histogram at the top right of his workspace—just above Lightroom’s various exposure sliders. The goal when establishing the white point is to stretch the graph until it hits or almost hits the border on the right.
Conversely a proper black point stretches the graph to the left edge. He uses the white slider in the first instance and the black slider in the second. In either case it’s essential to stop short of clipping the highlights or totally crushing the shadows, and Lightroom provides red or blue notifications when you’ve taken things too far.
Another way to verify the accuracy of these settings is to simply keep an eye on the image itself as you expand the tones in either direction. Depending upon the mood you’re attempting to create, you may want to go with your gut rather that adhere to exactly what the histogram recommends.

Plant demonstrates a few other tips and refinements that are worthy of attention. This is an effective technique for most situations, and it’s easier enough for inexperienced Lightroom users. There are many more quick tips like this on the Photo Masters YouTube channel.
And don’t miss the post-processing tutorial we featured with a widely acclaimed Adobe expert who demonstrates how to take advantage of Photoshop’s updated Object Selection tool that now features precise AI People Masking.

We’ve all captured what were thought were compelling low-light photos, only to return home, pull them up on the computer and discover that they’re “grainy, gross, and noisy.” Today’s quick tutorial from the Trav in the Bush YouTube channel insists that the problem isn’t with your camera and explains how to rid photos of these ugly image-killing artifacts.
Trav is a professional bird photographer from British Columbia, Canada who creates straightforward, relatable tutorials for like-minded shooters. Today’s nine-minute episode provides practical tips for cleaning up you act when shooting in the field.
He summarizes the tutorial like this: “I’m going to explain what causes noise and three ways to stop it so your photos will look clean and sharp no matter what camera you’re using or the level of your skills.” His trio of tips are presented in the context of photographing birds, but they’re equally effective for all sorts of nature and wildlife photo adventures.

The lesson kicks off with an overview of the problem, and Trav explains the basics like this: “Noise is that speckled, grainy texture that appears in a photo—especially when you’re shooting in dim conditions.” It can even rear its ugly head in high-end professional cameras with results that he describes as “messy.”
And here’s where the concept gets interesting, according to Trav: Most people blame noise on high ISO settings (which do play a role) but elevated sensitivity is not the evil villain in this demoralizing drama. Trav puts it simply: “The real culprit is a lack of light hitting the camera’s sensor.”
As the theory goes, high ISO settings do not create noise, “they simply amplify the signal that your camera captures.” So if that signal is weak these unfortunate artifacts are sure to appear. Trav provides the analogy of cranking up the volume on an audio recording until static overwhelms the purity of sound.

In other words, “your camera is unable to add light to a photo, it can only work with the light you give it.” Theory aside, what you really want to know is how to fix this aggravating occurrence, and Trav’s trio of simple tips demonstrate everything you need to know.
The bottom line is this: whether you’re boosting ISO in the camera or increasing exposure during post processing you may be boosting both the good stuff and the bad stuff in an image, so follow Trav’s advice. Once the video concludes head over to the instructional Trav in the Bush YouTube channel where you’ll find many more basic explainers.
We also recommend watching a tutorial we featured with a Certified Adobe Expert who demonstrates how to create mind-blowing b&w photographs with a powerful HDR post-processing technique.

Photoshop’s Object Selection tool has been significantly improved and now includes a powerful AI People Making feature that will quickly and effectively improve your workflow when editing images that include people within the frame. The tutorial below from one of our favorite post-processing instructors explains exactly how it works.
Instructor Julienne Kost is an adept photographer, respected author, and an expert at all things Adobe. In the next four minutes you’ll learn how this timesaving feature uses artificial intelligence (AI) to detect, select, and mask anyone that appears in your images. And it’s quite precise.
In barely four minutes Kost demonstrates how to employ this capability to not only mask entire people but narrow your selections to very specific regions like a subject’s hair, an assortment of facial features, clothing, and more. In other words, this technique is about as versatile as can be.

With the Object Selection tool in play, Kost uses Photoshop’s Disclosure Triangle to choose Cloud. That’s because doing so provides greater detail and superior results. As you hover your cursor over the image, Photoshop will display a magenta color atop all the people regions that it detects.
If you hover the cursor over the edge of a person Photoshop will detect and mask that person in their entirety. It’s easy to choose any of the various overlay options by clicking on the Gear icon and increasing opacity to 50% which makes the overlay moew prominent. There are also options to hide the overlay when you find it too distracting.
The easiest way to select the region you want, like a person’s hat, is to simply click on the overlay to convert it to a selection. Then you can change the color of the hat, for example, by adding an adjustment layer and selecting the Hue/Saturation option in the panel’s dropdown menu. You can apply other types of enhancements to various regions by follow the same quick-and-easy approach.

You can also use the Select People option by clicking on the thumbnail of a person and then specifying whatever selection you desire, i.e. the entire person, a specific region, or a combination of regions. Kost walks you through several adjustments to illustrate the appropriate steps.
That’s pretty much it, although Kost describes the process in greater detail and provides a few additional tips for achieving the best possible results. You can find a wealth of helpful Photoshop and Lightroom tips and techniques by visiting Kost’s internationally popular YouTube channel.
We also recommend watching an earlier tutorial we featured with another image editing expert who demonstrates how he crafts spectacular b&w photographs by employing Lightroom’s transformational HDR editing mode.

Adobe has updated Lightroom to version 14.3 and there’s lot to unpack as you’ll see in our upcoming tutorials. Today’s episode is devoted his one “huge” new feature landscape photographers have been awaiting that’s been available in other post-processing software for some time.
The topic at hand in this episode from Anthony Morganti is Lightroom’s new Landscape Masking capability and you’ll learn exactly how in works in the next 12 minutes. Be sure to watch until the end when he provides an overview of other key features—with links in the description beneath the video for those of you who are interested in a deeper dive.

Morganti is a globally popular photographer, professional retoucher, and educator based in Buffalo, NY and he kicks off this lesson by explaining why he considers this long-awaited Lightroom masking tool so significant. His demonstration seascape image is a perfect example because there are several key elements in the frame—including a dramatic sky, water with reflections, and buildings in the foreground and middle of the shot.
Morganti’s photo even incudes some vegetation and a prominent Lighthouse that deserves to be accentuated, and when you click Masking atop the screen you’ll note the new Landscape tool within the familiar panel. Here’s what happens when you select this option: “AI will examine the image and determine what is in the scene.”
As you’ll see, Lightroom quickly found the Sky, Architecture, Vegetation, Water, and Artificial Ground—all elements that appear within the Landscape Masking panel. By hovering over any of these items you’ll get a mask for making whatever enhancements you desire. Morganti admits that while these timesaving selections may be imperfect they’re a great starting point for any necessary refinements.

Once you understand the concept and see how it works it’s super easy to make whatever enhancements you desire. Stay tuned for more how-videos on a variety of new features in the recent Lightroom update. In the meantime, be sure to check out Morganti’s instructional YouTube channel where there’s much more to learn about all things Adobe.
We also recommend watching a recent tutorial we featured with another post-processing expert who demonstrates how to use what she says is “Lightroom’s most powerful tool” to unlock the full potential of every photograph you edit.
![]()
Lighting company Profoto just released a compact light modifier called the Spot Small.

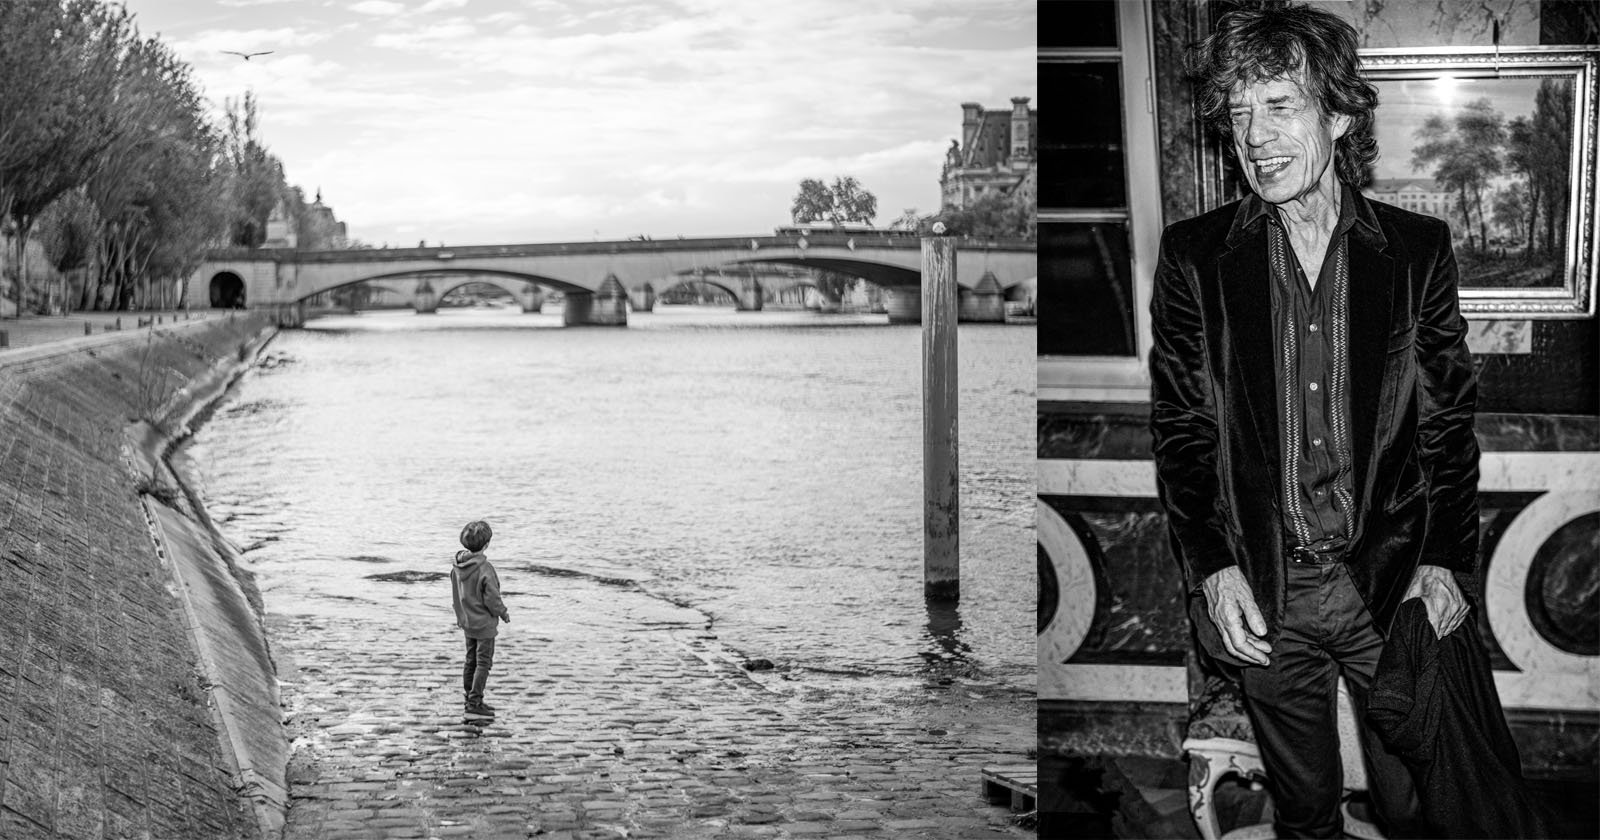
Paris is perhaps the most important city in photography’s history. As the birthplace of the medium, it has long been a haven for iconic photographers. It’s no surprise, then, that contemporary documentarians continue to turn their lenses on the City of Light — Mathieu Bitton being one of the most notable, capturing its essence over the last 15 years.

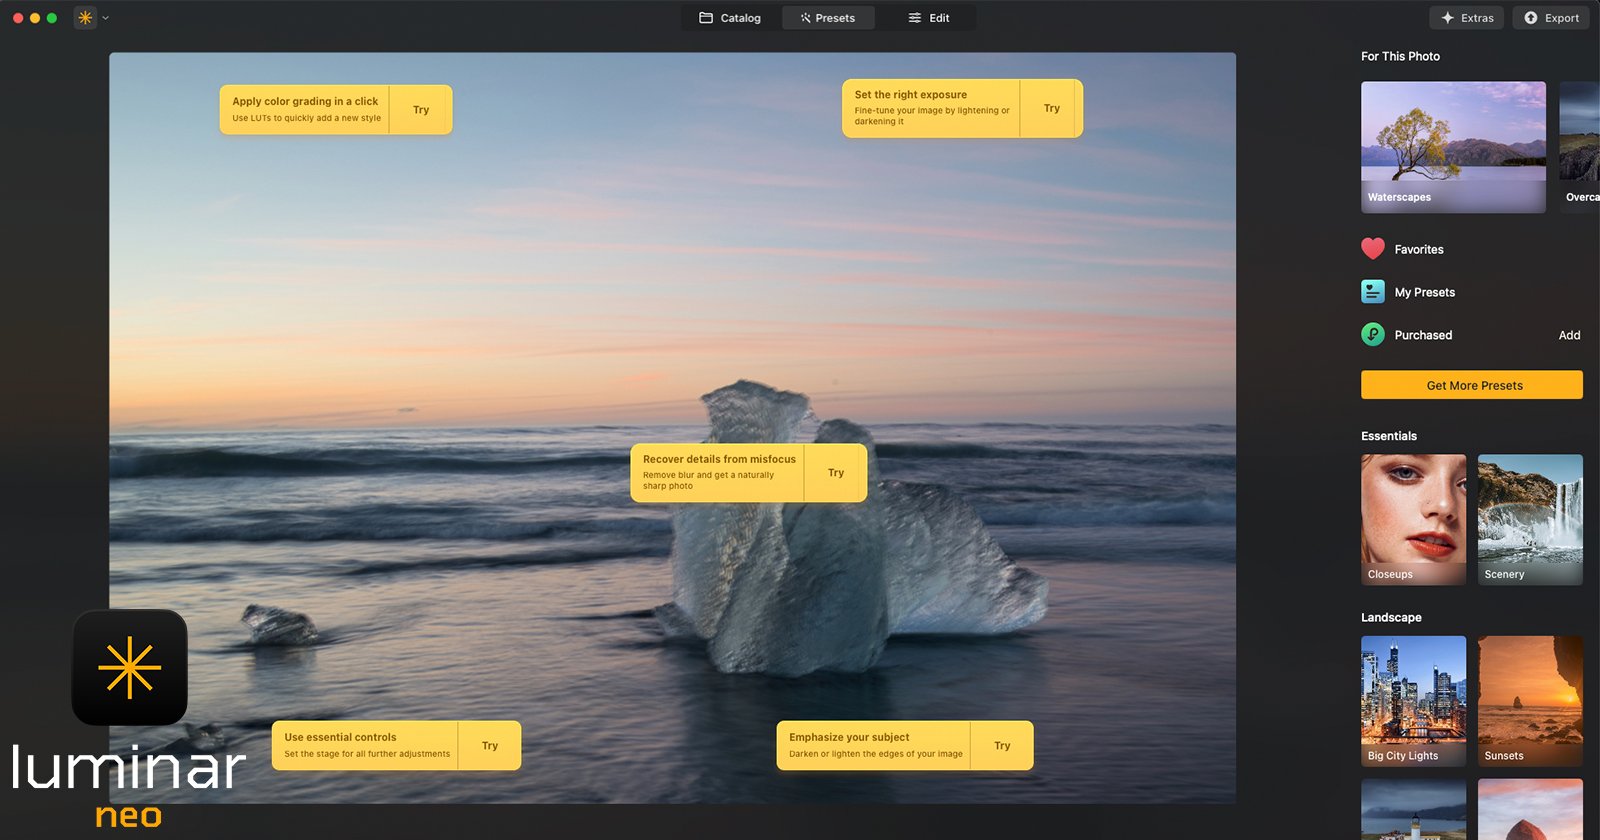
Skylum Software released its Spring update for its Luminar Neo photo editing software, adding new artificial intelligence (AI) tools designed to streamline the user’s workflow.

At Adobe MAX London, Adobe announced new updates and improvements for its popular photo editing applications, Photoshop and Lightroom. The improvements include better selections, improved color editing, and a streamlined workflow.