hab.png

Weekly Wrap Up!

The post Weekly Wrap Up! appeared first on Digital Photography School. It was authored by Sime.

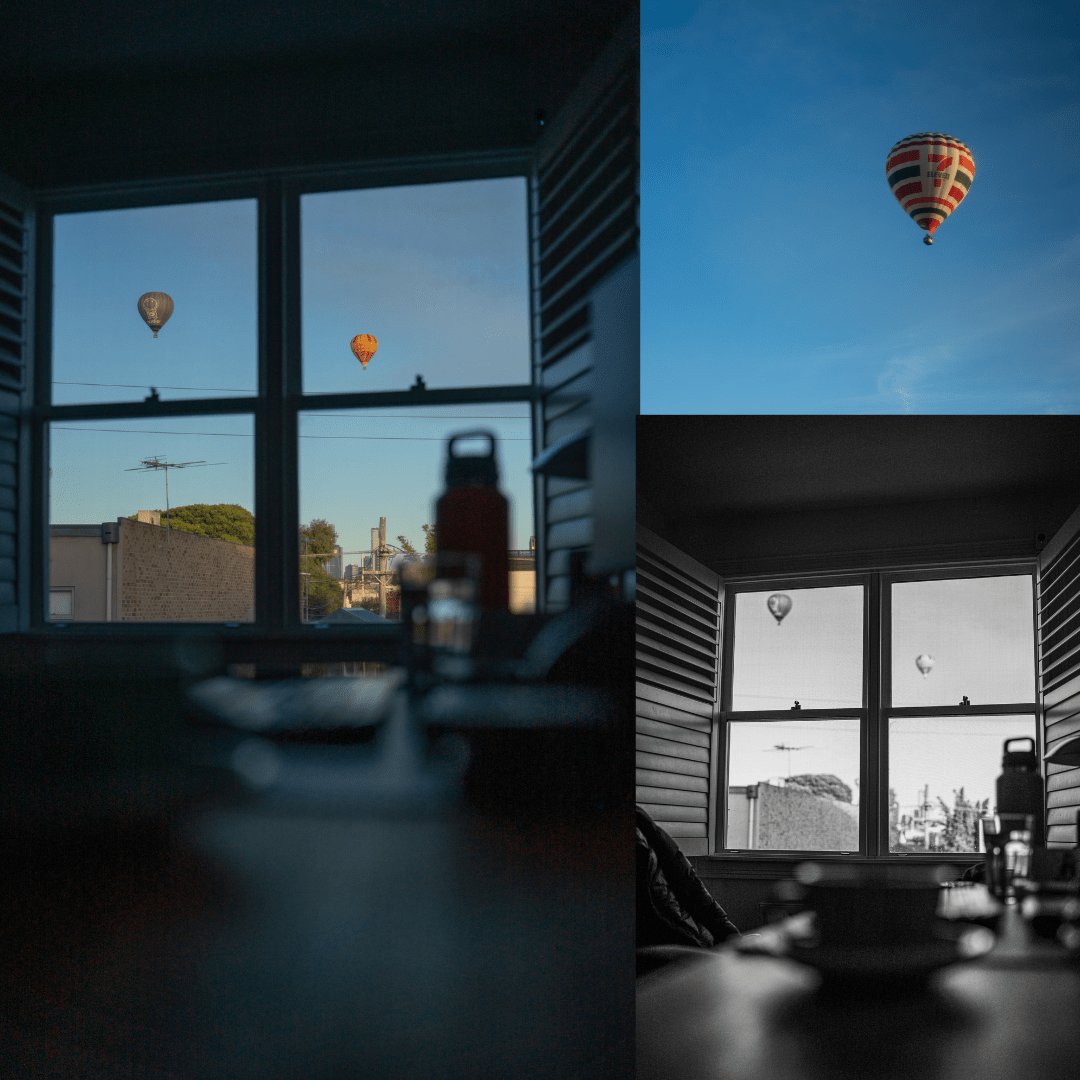
What did you do with your camera this week? We actually want to know! Inspiration goes both ways, right? Pop us a comment, even just to say g’day. I try to get out with my camera as often as life allows! I just (literally, moments ago haha) tried to setup a shot where you could see the hot air balloons and my desk in the foreground – kinda tricky! Bright morning sun and a relatively dark office, but its always fun to try! Anyways, I’m rambling – Say hello in the comments, share a photo! Have a good weekend. (Its Friday here in Melbourne)

Weekly Wrap Up!

Weekly Wrap-Up: From Portraits to Minimalist Landscapes

Another week, another treasure trove of photography tips and inspiration! Here’s what caught our eye in this week’s issue of Digital Photography School. Not Subbed? Join Us Here – It’s Free

Portrait Perfection: 10 Tips to Level Up – [read it…]

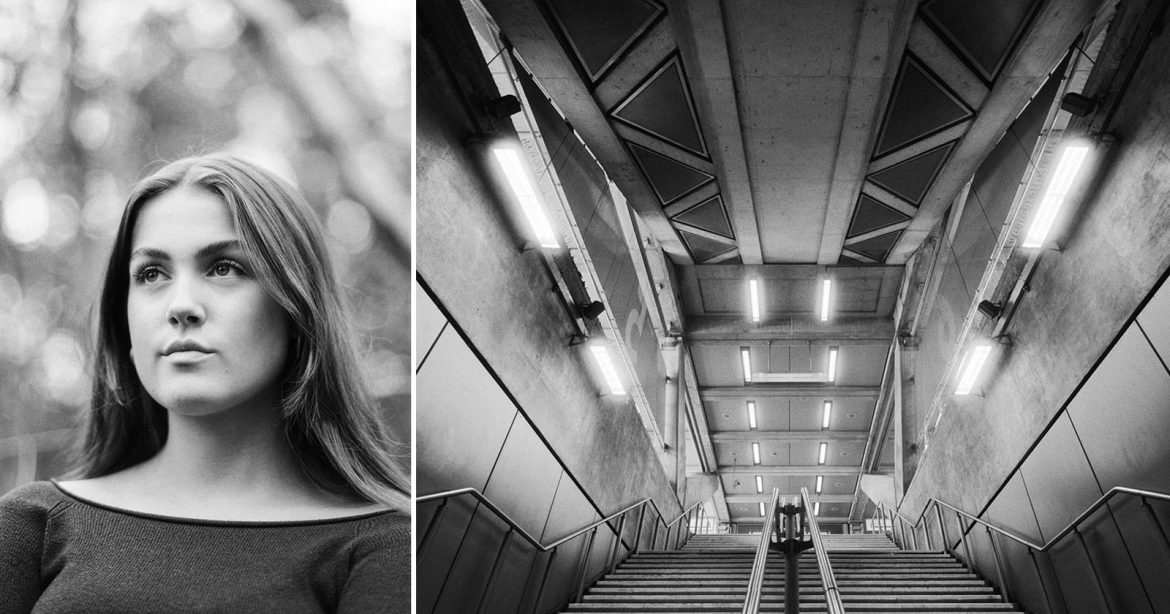
First up, a standout piece—10 Ways to Take Stunning Portraits. Whether you’re photographing friends, clients, or strangers, this guide is full of quick wins and deeper insights into lighting, posing, and bringing out natural expressions. A must-read for anyone looking to elevate their portrait game.

Minimalist Landscapes: Less Really Is More – [Interested?…]

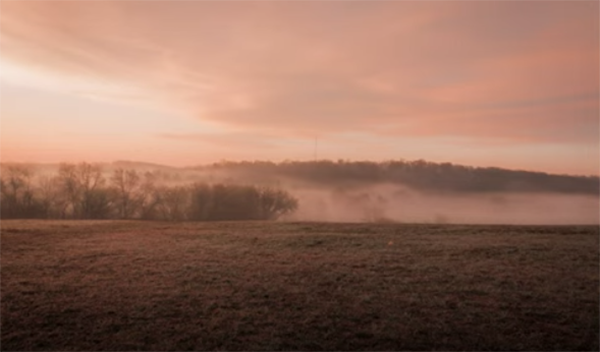
Minimalist landscape photography is having a moment, and for good reason. This week’s Simple Guide to Minimalist Landscape Photography breaks it down beautifully—how to see simplicity in chaos, use negative space, and create serene, compelling compositions with very little.

Bird Photography Lighting: 7 Gorgeous Tips – [The bird!..]

Bird photographers rejoice! There’s a great piece on lighting for bird photography. It covers natural light, angles, and timing to help you get those crisp, well-lit avian portraits—without disturbing the subject.

Fisheye Fun: Creative Uses for a Unique Lens – [Go wide!…]

Got a fisheye lens collecting dust? This quick guide with five tips might spark some fresh ideas. Think beyond the cliché skateboard shots—there’s room for artistry here. Here’s a Fisheye photo out of my camera, the last time I used my Lensbaby Fisheye… Lifetime ago!

Weekly Wrap Up!

After Dark: Low-Light Landscape Mastery – [Low Light Love…]

Low-light landscape photography can be tricky, but this guide is packed with tips that make it far less intimidating. It’s perfect for night owls chasing star trails or dawn chasers looking for that pre-sunrise magic.

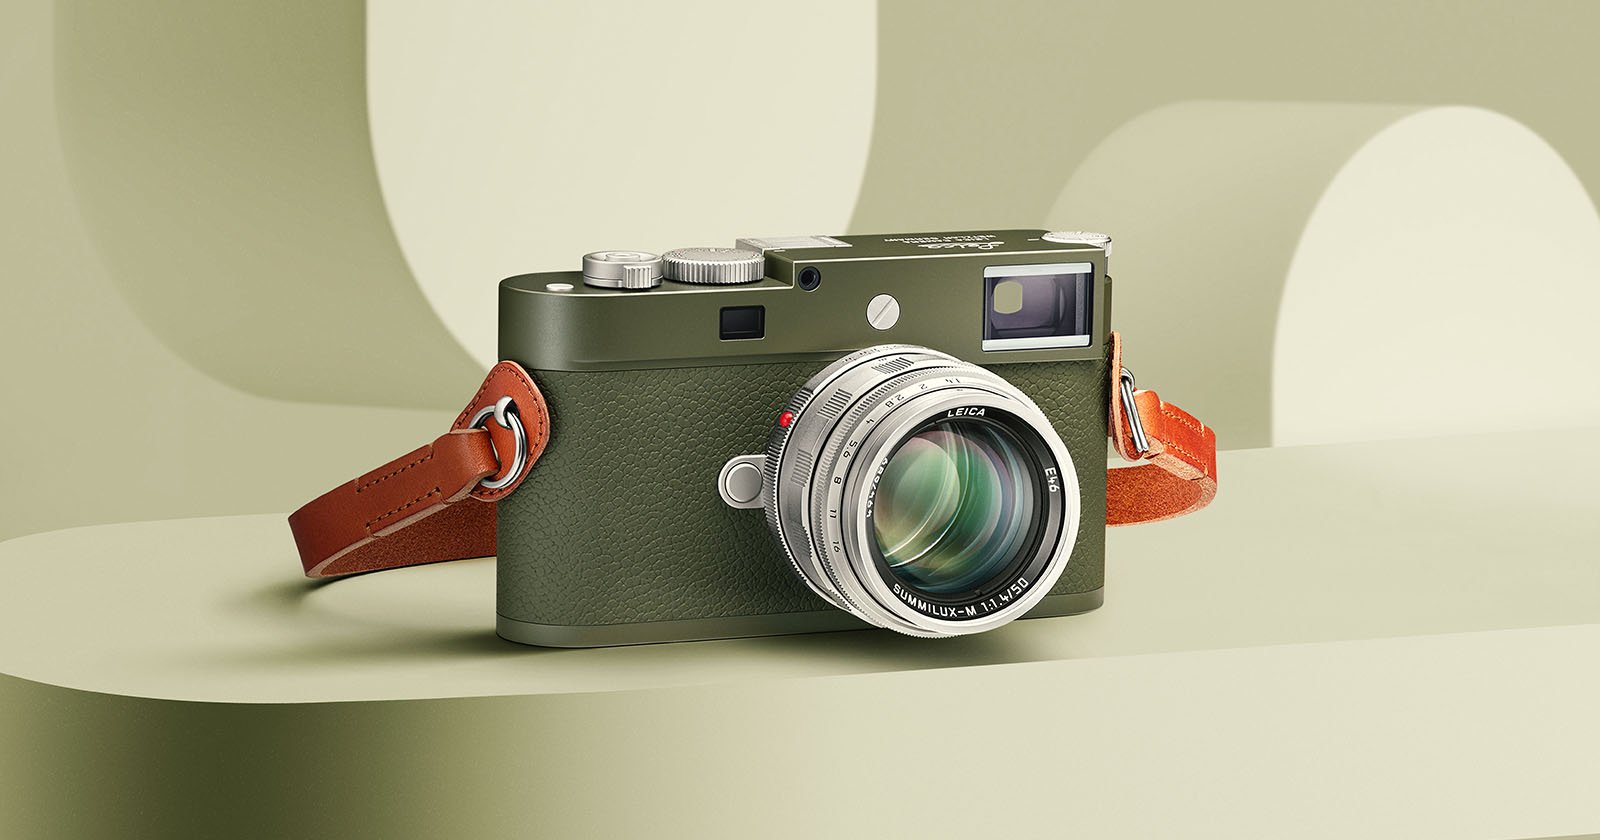
?? Gear Reviews: Filters & Storage

Weekly Wrap Up!

There are two solid gear reviews this week:

  • K&F Concept Filters get a hands-on test, with insights into how they handle different lighting conditions.
  • A closer look at the Synology DS925+ cloud storage solution—ideal for photographers juggling growing archives.

Post-Processing Corner – [Which Tablet?]

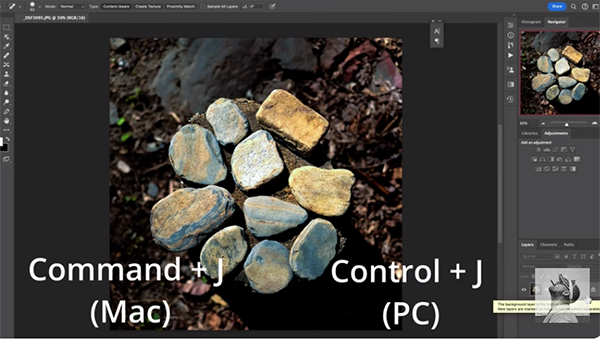
If you’re editing with a graphics tablet (or thinking about it), the post on 10 Powerful Tips for Editing with a Tablet is worth your time. It covers workflow, brush settings, and getting the most from pressure sensitivity.


That’s a wrap on this week’s photography reads! Whether you’re shooting portraits, chasing birds, or editing under the stars, there’s something in here for every kind of creative.

Catch you next week with more picks from the inbox. Until then, happy shooting! ?

The post Weekly Wrap Up! appeared first on Digital Photography School. It was authored by Sime.

1JF5725_0.png

3 Image-Killing Lightroom Errors You Must Fix Today (VIDEO)

Today’s post-processing tutorial from the popular Photo Feaver YouTube channel falls into the common category of “my images don’t look as great on the computer as they did through the viewfinder.” Fortunately, it’s easy to create the high-quality results you expect by avoiding three common Lightroom mistakes made by beginners and more experienced users alike.

Instructor James Feaver (namesake of the channel) puts it like this: “We’ve all been there, trying to edit our photos to make them looks as best as possible. But sometimes they come out bland, flat, undersaturated, or in some cases even looking like rubbish.” That’s a bit harsh, but you get the idea; namely, they beg to be improved.

The trio of simple tips you’ll learn in barely eight minutes will help turn the tide and provide a welcome wave of head-turning edits. Feaver refers to the first calamity as “Dynamic Range Doom” that either occurs when you don’t utilize Raw files properly or employ the wrong sliders to make exposure changes that cause an unwanted reduction in dynamic range.

His example is an unimpressive landscape photo that looks really flat “because of what we’ve done within Lightroom’s Basic panel.” His preliminary edit included modifying exposure and bumping up contrast by 25%, but the image still looks boring and dull. As you’ll see, the issue has to do with an improper use of the sliders underneath; namely, highlights, shadows, whites, and blacks.

Fever explains that the white and black sliders are very nuanced, and “you want to avoid making any exposure changes with them.” Put another way, your images may look washed out if you take an incorrect approach. One quick clue is when white tones appear muddy light gray. So check out the quick solution that Feaver provides.

Next on the list is the so-called “Contrast Conundrum” and Fever illustrates this one with an environmental portrait of a bride and groom walking along a path in a lush, green landscape scene. As you’ll see, simply “wacking up contrast” doesn’t really help (and may create other problems like an unnatural dark appearance) unless you follow the advice that Feaver recommends for eliminating “image stress.”

The episode concludes with a description of Fever’s “100% Rule” that’s super simple and goes like this: “Never use a slider or an effect to it’s absolute maximum.” Otherwise, bad things with unsightly results are sure to happen. He demonstrates this mistake with an indoor portrait that has a lot to be desired.

There are plenty of good things happening on Feaver’s very helpful YouTube channel, with how-to videos covering a wide range of topics.

And don’t miss another tutorial we featured with a very popular instructor who demonstrates five simple post-processing tips that all landscape photographers should understand.  The lesson includes a useful reference guide that you can download for FREE!

1aAW5725.png

The Old High Pass Filter is Still a Great Tool for Sharpening Photos (VIDEO)

Lately we’ve been featuring tutorials that highlight the versatility of older post-processing tools that have fallen by the wayside as Adobe continues to add new headline-grabbing features to Photoshop, Lightroom, and Adobe Camera Raw (ACR). We’re doing this again today in the following video that describes why you should take another look at the efficient High Pass filter sharpening tool.

Instructor Adam Welch says the strength and versality of high pass sharpening “goes well beyond simply making your images look cleaner.” In the next 13-minutes you’ll learn a quick-and-easy method for applying this forgotten tool in three straightforward steps that anyone can master with ease.

Welch calls himself a “nomadic photographist,” who specializes in large-format photography and alternative/historical printing processes. As such, he doesn’t willingly abandon tried-and- true methods that have served him well in the past. He notes that this sharpening method works great with all sorts of images, whether they’re captured with a modern digital camera or on film.

He describes the simple technique like this: “The High Pass Filter sharpens your photos, provides great control over the process, and you really don’t have to know anything about Photoshop because it’s one of the easiest tools around.” He further explains that Photoshop runs a mathematical algorithm to makes pixels in high-contrast areas appear to be sharper.”

Welch pulls up an image in Photoshop 2023 (he also uses the current version) and recommends taking a selective approach targeting specific area within the frame—rather than sharpening the entire image at once. This technique is a bit more involved than global sharpening, but it delivers vastly superior results.

It’s important to make sure a background layer is selected when first getting started. Then you’ll use a keyboard shortcut to duplicate the background layer where you’ll apply the High Pass Filter. “Now you can go back and add a mask to this sharpening layer to selectively sharpen any areas you want” without affecting other portions of the scene.

Now you’re all set and ready to go, and Welch walks through the step-by-step process for getting the job done. As you’ll see, Photoshop’s High Pass Filter is not only very easy to use, but  it’s both versatile and very effective for getting the natural-looking results you desire with a minimum of fuss. Once you’re done head over to Welch’s popular Tube channel that contains many more how-to videos for thinking outside the box.

And speaking of overlooked, legacy techniques, don’t miss the tutorial we featured with another image-editing expert who explains why Photoshop’s older Content Aware-Fill tool is still valid today. Then he demonstrates how it may outperform the new Remove tool and Generative Fill for eliminating distractions from your photographs.

portrait-tips.jpg

Photographing Children – Composition

The post Photographing Children – Composition appeared first on Digital Photography School. It was authored by Darren Rowse.

Composition-KidsI thoroughly enjoy photographing children and have opportunity to do quite a bit of it lately after many of our friends have had babies.

Probably the most important tip I’ve learned in photographing them is to get on their level. So many of my friends show me photos of their kids which are taken from 4 or so feet above the child which does nothing but dwarf them and make them look almost toy-like.

Getting on your hands and knees or crouching down before you take a shot of a child takes you into their world and helps you to engage with them through the images you take.

Photographing Babies

Babies are particularly difficult to photograph because they are so immobile. I find that one of the best ways to get good shots of them is to put them on a baby rug and too literally lie down next to them with your camera right on the floor. In this way you’re looking directly into their big beautiful eyes and it puts the viewer of the photo in the unique perspective of an eye to eye place. If the child has the ability to lift it’s head the effects can be amazing as you almost find yourself looking UP into their eyes.

Composition-Kids-2
Photographing Older Children
The same principle of getting down low applies with older children although you do have a little less lying on the floor with them when they are at an age of walking.

I particularly find that with older children the best time to photograph them is when they are doing something that they enjoy. Go to the park with them and their parents, visit their house when they are painting pictures, get them to take you on a tour of their room or take them out to play their favorite sport.

While they are doing their activity hover around (at their level) and take plenty of shots. Also include shots with them and their parents and keep an eye open for those candid moments when they fall over, do funny expressions or ham it up for the camera.

If your camera has a continuous shooting mode it might also be worth keeping that on with bigger kids who tend to move around more. As I look back at the times I’ve done this it’s quite interesting to see that it’s often the second or third shot in a sequence that is best. Shooting just one frame at a time can mean you miss these golden opportunities.

Another benefit of continuous shooting is that you can end up with a great series of shots that might go nicely together to tell a story (see below).


Img 815Composition-Kids-3Img 817

Change your Focal Length

Another great way to change the angles of your shots when photographing kids is to use different focal lengths. If you’re using a DSLR it might be worth investing in a couple of different lenses (a wide angle one and a longer zoom) to give you different options. If you’re using a point and shoot (most of which have at least a 3x Optical Zoom) make sure you use it.

Taking pictures with a wide angle focal length can be particularly effective when getting in close to children. It opens up the angles and gives all kinds of interesting perspectives. I use a 17-40mm zoom lens on my DSLR which is brilliant for this. It still allows me to zoom in a little but at 17mm the impact is amazing.

A zoom lens allows you to take photos from further afield and will particularly be useful if the child is distracted by you taking photos. I use a 70-200mm zoom (the third image above was taken with it) which I find very useful.

Have Fun

Lastly, the key to good kid shots is to rediscover your own inner child. Kids love to have fun, they do the unexpected, they love to experiment and test things out and they love to play. Approach photographing them in this spirit and you’ll find your pictures take on a wonderful childlike quality.

portrait-tips.jpg

Table of contents

Kids Photography

var dpsTopics = {
id: 10,
titles: [] };

The post Photographing Children – Composition appeared first on Digital Photography School. It was authored by Darren Rowse.

BH-is-Bringing-its-Bild-Expo-in-New-York-Back-in-June-2025.jpg

The New York Bild Expo Adds Cristina Mittermeier and Peter McKinnon to List of More Than 100 Speakers

The image shows a logo with the word "BILD" in bold black letters framed by a black rectangle with a small yellow circle on top, followed by "expo" in lowercase letters. The letters "e," "x," "p," and "o" are colored in orange, yellow, red, and blue respectively.

The Bild Expo, operated by B&H Photo, is returning to New York on June 17 and 18 at the Javits Center. Free for all to attend, the event will combine a show floor attended by major imaging brands such as Canon, Nikon, Fujifilm, Sony, and DJI with a docket of more than 100 speakers, including Peter McKinnon, Cristina Mittermeier, and the PetaPixel Podcast team.

[Read More]