1JF51925.png

These Hidden Lightroom Tools are Essential to Learn Now (VIDEO)

Lightroom boasts a bewildering array of powerful tools, but some of them are difficult to find. In fact, instructor James Feaver says that, “unless you’ve been using Lightroom for a very long time, you may not even know they exited to begin with. And today I’m going to share my seven favorites.”

Feaver is a British pro who shares twice-weekly instructional Adobe videos that are appropriate for advanced users and less-experienced photographers alike. At the top of today’s list is what Feaver refers to as “Lightroom’s Hidden Color Profiles”—effects that can be applied to an image before you begin applying adjustments and enhancements.

Most of you are familiar with the Profiles tab located within a dropdown menu in Lightroom’s Basic panel, with choices like Adobe Color, Landscape, Portrait and B&W options at the bottom. But did you know there are a lot more Lightroom Profiles, as many as 100, to be found by clicking a button? If not, they’ll be a secret no more.

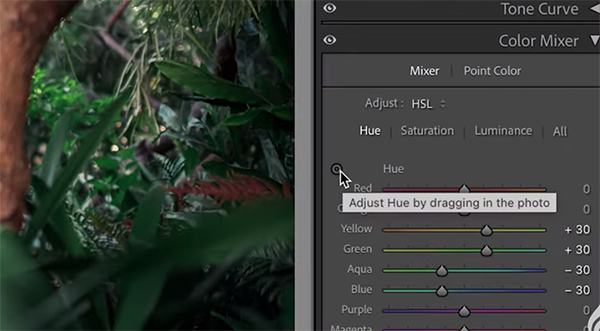
Feaver moves on to an obscure tool he calls the “Color Picker Color Mixer.” This one is very helpful when working in Lightroom’s Color Mixer panel that can be confusing if you’re new to the game. This trick makes it super simple to work out which slider correlates to a specific tone within an image.

The trick here involves a tiny icon atop the panel that enables you to “Adjust Hue by dragging in the photo.” Simply click on this small circle and choose a hue. Then, if you drag it up and down you’ll see how Lightroom targets that color and lets you quickly change it.

Feaver’s third hidden tool is similar to #2 and he names it the “Color Picker Tone Curve.” This one, as you may expect, is located within Lightroom’s Curves panel and is also accessed by clicking the small circular icon. It’s super help for adjusting exposure instead of color as before. “All you have to do is hover over an area within the frame, click on that spot, and then you can instantly make it brighter or darker.

At this point you’re not even halfway through the lesson, with four more hidden tools to disclose. After watching until the end you’ll likely decide to revise your everyday workflow accordingly. Then pay a visit to the popular Photo Feaver YouTube channel where there’s much more to learn about editing your photos.

We also recommend watching a tutorial we featured with another post-processing specialist recently who demonstrates the best way to create high-density-range (HDR) photographs in Lightroom with maximum details in highlights, shadows, and midtones.
1SD51925.png

Lens Filter Tricks for Outdoor Photos with a Unique Look (VIDEO)

If you’re not taking advantage of lens filters, this tutorial from one of our favorite instructors might just change your mind and enable you to capture outdoor photographs with a unique attention-grabbing look. These transformational accessories are among the most affordable there are and you’ll learn which ones Simon d’Entremont says you should have in your bag.

Simon is a well-respected nature and wildlife photographer based in beautiful Nova Scotia, Canada. He’s also a globally popular educator who says the mission of his instructional YouTube channel is to “lift the knowledge, skills, and spirits of the people around me so they can be at their best.”

In the next 11 minute’s Simon describes his favorite types of filters, when and how to use them, and how they affect exposure. He also provides a link in the description the beneath the video where you can purchase filters that meet your needs, along with other accessories that he finds particularly helpful.

The question isn’t if filters will enhance your results, but rather which ones are most appropriate for your specific genre of photography. One warning up front is to avoid purchasing cheap no-name brands because it’s silly and counterproductive to mount an inferior product on a good lens just to save a few bucks.

Simon’s recommendations span the gamut from neutral density (ND) filters, polarizers, protective UV filters, and even mist filters. His bottom line is that some of these are must-have accessories—especially if you regularly photograph landscapes and/or nature and wildlife imagery.

The next step, after making your choice, is to understand exactly how they work, mistakes to avoid, and exactly what effects to expect. Simon illustrates his practical real-world advice with beautiful photos that drive these points home

The video concludes with several buying tips, including the most important features to look for. Once you’re done, head over to Simon’s popular YouTube channel which is a great source of inspiration for everyone who shoots in the field.

And don’t miss the tutorial we featured recently with a post-processing expert who demonstrates a straightforward Lightroom technique for enhancing Blue Hour photographs with beautiful, soft light.

1R51825.png

Backlit Photos Are a Breeze: 5 Wildlife Tips for Beginners (VIDEO)

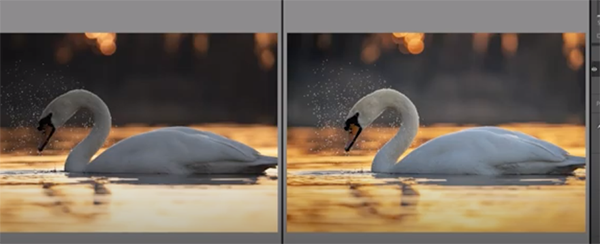
Experienced outdoor photographers understand why shooting into the sun is a sure-fire way to capture attention-grabbing images with a unique look. Achieving correct exposures can be challenging for beginners who don’t understand the technique, but this tutorial from the Wildlife with Rich YouTube channel quickly demystifies this process so you can get in on the action today.

Here’s how Rich describes the four-minute episode: “We’ll reveal five easy tips that make backlighting a breeze. We cover everything from getting a correct exposure and positioning considerations, to editing methods for adding this dramatic effect to your everyday toolkit.”

Rich says the main issue when it comes to backlighting is the wide dynamic range that you’ll confront when shooting towards the sun. Simply put, “If we’re able to make the right decisions in the camera, we’re able to maximize the amount of detail we retain in both the key subject and the sky.

Tip #1 is to carefully evaluate the position of the sun in relation to the subject and the vantage point from which you shoot. Rich explains that “the closer the sun is to directly behind a subject, the more contrast there will be between this key element and the background.” This is why it’s necessary to apply a few thoughtful tricks that will balance all the tones from highlights to shadows to everything in between.

Rich then describes why  he recommends underexposing an image by 2/3 of a stop. As he says, this will allow you to retain important details within the highlights and bring back details in the shadows. Doing this requires as much data as possible, which is why shooting in Raw is a big benefit that offers far more control during post processing.

He explains why shooting in raw “helps us recover missing details without introducing too much unsightly noise.” You’ll watch Rich demonstrate practical applications for the foregoing and his other helpful tips in the field while photographing birds circling overhead with everchanging light.

If you enjoy wildlife and nature Photography be sure to visit the Wildlife with Rich YouTube channel for more tips and techniques.

And on a related note, don’t miss a tutorial we featured recently with another accomplished outdoor shooter who demonstrates how to embrace harsh, midday light coming from any direction and use it to capture spectacular high-contrast photographs.