In recent years, YouTube has become a breeding ground for AI-generated fake movie trailers, flooding the platform with misleading yet captivating content. These videos, which often combine snippets of legitimate footage with AI-generated visuals, have amassed billions of views.
Barcelona Will Make a Dedicated Public Square for Selfie-Taking Tourists
Barcelona is creating a large public square dedicated for tourists to take selfies near Sagrada Familia, after widespread anger over mass tourism in the Spanish city.
Photographers: These Astronauts Need Your Help With Aurora Lights
The astronauts currently orbiting both polar regions — the first humans to ever do so — are asking for help from photographers on terra firma.
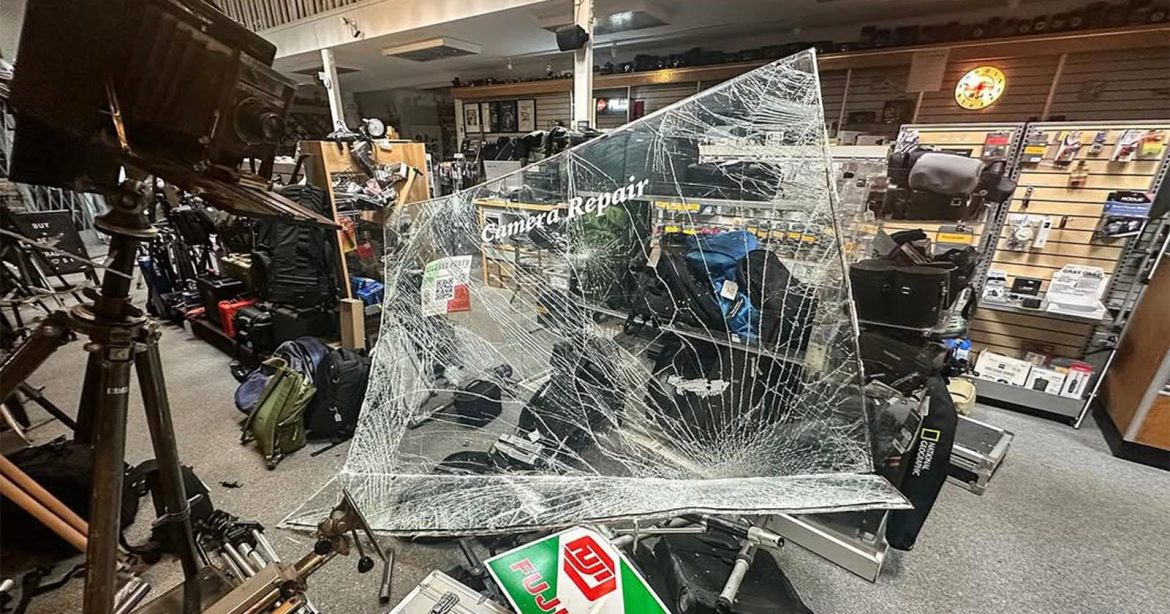
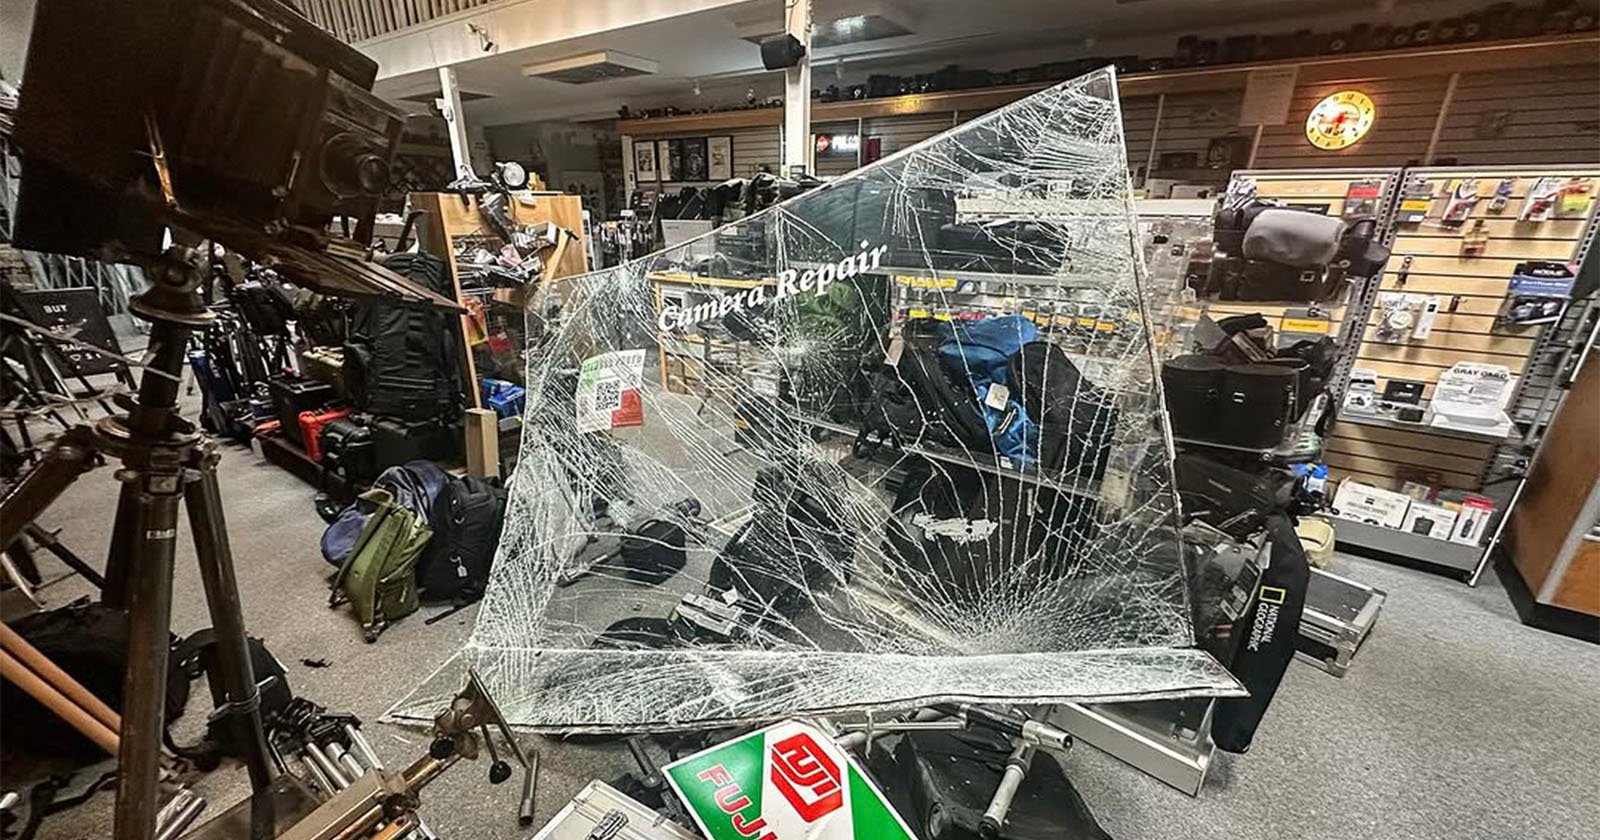
Bay Area Camera Store Robbed of $50,000 Worth of Gear in Raid
A camera store in San Rafael has been rammed with a car and raided. It is the fifth such robbery in the Bay Area in a little over a month.
Contrast Masking for Snow Scenes, Beach Photos & More (VIDEO)
Lightroom’s easy-to-use Contrast tools are useful in a wide variety of situations, but here’s the deal: When you make these adjustments selectively using masks, you’ve just hit on a very powerful combination. That’s what you’ll learn how to do in this eye-opening tutorial from the PHLOG Photography YouTube channel.
We suggest downloading the sample Raw file with a link beneath the video so you can follow along as the straightforward process is explained. And even though this is a snow-covered winter shot, you can take advantage of these techniques throughout the year—like when photographing on the beach in summer or with whatever high-contrast scenes you confront.
Today’s instructor Christian Mohrle is a highly acclaimed German landscape photographer and post-processing expert. If you’ve watched his videos in the past you know that he always begins with several basic global adjustments to improve his original image as much as possible before turning to the magic of local enhancements.

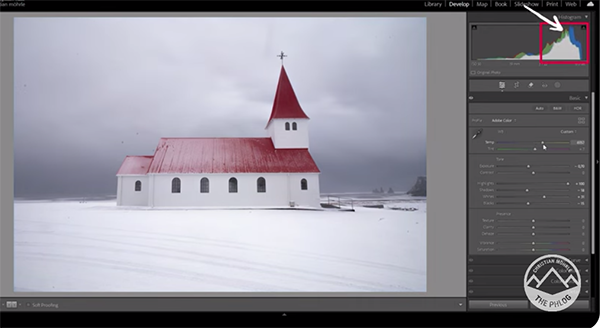
Mohrle opens Lightroom’s Basic panel, leaves the Profile untouched, and immediately gets to work on the Exposure with the goal of creating a slightly darker overall look. This quickly reveals greater details in the dark sky, while Mohrle carefully brings down shadows while paying close attention to the histogram to avoid any clipping.
The next step is slightly increasing highlights and whites to make the snow appear more realistic. There’s still a rather heavy blue cast to the photo which is easily reduced (but not entirely eliminated) by carefully manipulating the Temperature slider. Mohrle envisions a “sharp and clear” result so he boosts Texture and Clarity.
The final preliminary adjustments include increasing Mid-Tone Contrast and Vibrance, after which the original image is noticeably improved. The fun part now begins as Mohrle demonstrates how to introduce simple masks to enhance individual areas throughout the frame.

By mimicking this technique you’ll achieve a perfectly balanced image with just the right amount of attention-grabbing contrast. Mohrle’s impressive transformation concludes with thoughtful color grading and a bit more sharpening. Once the lesson is over, pay a visit to the popular
The PHLOG Photography YouTube channel which contains a wide-variety of image-editing tips and techniques.
We also recommend watching the earlier video we posted, discussing how to clean up your image library mess with Excire’s intuitive catalogue management software.
Golden Hour Tones: How to Boost Them or Add Them (VIDEO)
Outdoor photographers love shooting at Golden Hour when soft, beautiful, warm light paints the landscape. But why do photos sometimes look far less captivating than you expect, and how can you remedy this common problem?
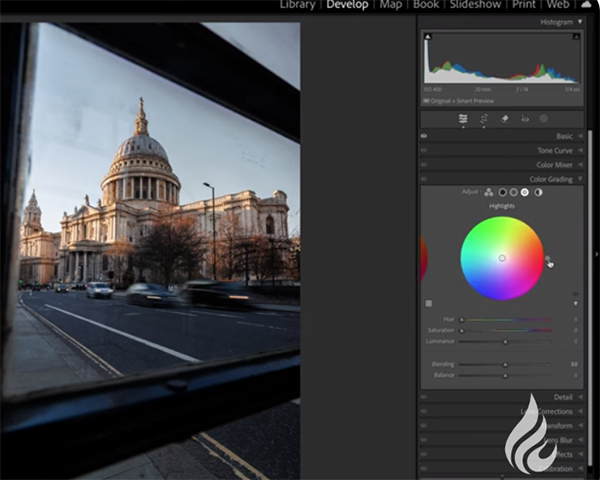
Today’s post-processing tutorial from the popular Photo Feaver YouTube channel comes to the rescue in barely six minutes with a straightforward Lightroom technique that even beginning users can apply with ease. Instructor James summarizes the episode like this: “In today’s video I’m going to demonstrate how you can really emphasize those warm golden tones using nothing but Lightroom.
In fact, James breaks down his simple advice into two categories: One when the goal is to enhance a photo’s warm tones in a realistic way, and another for creating golden hues when there are none to be scene. In either case, the results you’ll achieve will truly be majestic.

There’s a link in the description beneath the video for downloading Feaver’s demonstration image so you can follow along and make the adjustments yourself in real time as the step-by-step process is explained. Then sit down at the computer, open Lightroom’s Basics panel, click the Play button below, and follow along.
James walks you through the necessary adjustments in the corrects sequence, beginning with White Balance as you might suspect. He offers this interesting note: “Most of the time I talk about getting the correct White Balance but in certain cases like this one today, the correct White Balance doesn’t mean it’s the right White Balance.” Then he explains his suggested approach.
You’ll learn more key enhancements, helpful tools, and other important considerations as this explainer proceeds—all of which deserve a place in your Lightroom bag of tricks. In fact, we bet that you’ll revisit some landscape images you shot in the past that didn’t quite make the grade, and significantly improve them with your newfound skills.

Be sure to visit the Photo Feaver YouTube channel and do what 75,000 other photographers have done: Subscribe!
And don’t miss the instructional video we posted recently, revealing what another pro says are five of the most common post-processing errors. You’ll learn how easy is to avoid for photographs that look great no matter where or how they’re.
Aiarty Image Matting: Photographer’s Secret to Streamlined and Flawless AI Background Removal
The post Aiarty Image Matting: Photographer’s Secret to Streamlined and Flawless AI Background Removal appeared first on Digital Photography School. It was authored by Sime.
Ever spent hours painstakingly masking hair strands or fixing jagged edges after removing a cluttered background? What if you could skip the tedious work and let AI handle the heavy lifting—while you focus on creating stunning images?
You know backgrounds can make or break a shot. A messy room, harsh lighting, or an overcast sky can ruin an otherwise perfect portrait. But manually removing backgrounds? That’s time you could spend shooting, networking, or simply enjoying life behind the lens.
Aiarty Image Matting is designed to tackle these very challenges head-on. This isn’t just another “magic wand” tool. It’s an AI-powered background remover. No more wrestling with Photoshop’s Quick Selection Tool or drawing manual trimaps. Aiarty Image Matting delivers precision on tricky details (think frizzy hair, lace veils, or water droplets) and speed for batch-editing thousands of images—all with one-click simplicity.
Special Offer: Ready to ditch the tedious background removal grind? Aiarty Image Matting offers a 1-Year License Giveaway so you can test its power firsthand. For photographers ready to level up their workflow, unlock unlimited access at an unprecedented low price. Or you can directly grab our AiMeida package here!
Try Aiarty Image Matting Risk-Free and Claim Your Free Trial Now!

Smart Tools for Specific Photography Needs
Let’s face it: not all background removal tools are created equal. Aiarty’s AI is built to tackle the unique challenges photographers face daily. Here’s how it simplifies your workflow while delivering pro-level results.
Flawless Edges, Even on Tricky Details
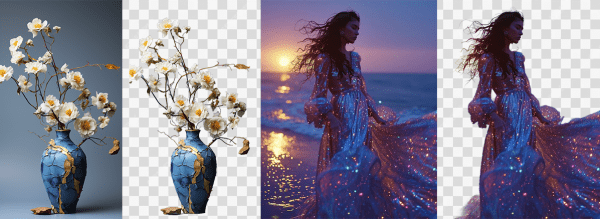
Struggling with frizzy hair, lace veils, or splashing water? With the unique Alpha Matting, Aiarty handles semi-transparent edges and fine details effortlessly. No more jagged halos or lost textures—just clean, natural blends that look like you spent hours masking (but you didn’t).
One-Click Simplicity, Pro-Level Results
Why waste time on complicated tools? Aiarty offers four models trained for different image types. Import your image, choose a model, and let Aiarty work its magic. It’s that easy, making advanced techniques accessible to photographers of all skill levels.
Refine with Control, Not Complexity
Need a quick tweak? Aiarty’s smart editing brush tools let you refine edges or restore details in seconds. Think of it as a digital eraser—but one that actually understands your subject. In addition to the precise AI detection, you can use Manual Selection to adjust the area you want to keep.
Batch Process Thousands in Minutes
Shooting a wedding or product catalog? Aiarty edits loads of images at once, so you can focus on what matters: capturing moments, not clicking buttons. Edit 3,000+ wedding or product photos in one go. Ideal for high-volume projects. It’s faster than brewing your morning coffee.
How to Use Aiarty Image Matting
Editing doesn’t have to be a headache. With Aiarty Image Matting, you can go from raw image to polished masterpiece in just a few simple steps. Here’s how it works:
Step 1: Import Your Image
Drag and drop your photo into Aiarty Image Matting—whether it’s a single portrait or a folder of 3,000 product shots. The software supports raw and high-resolution files, so your 4K edits stay crisp and professional.
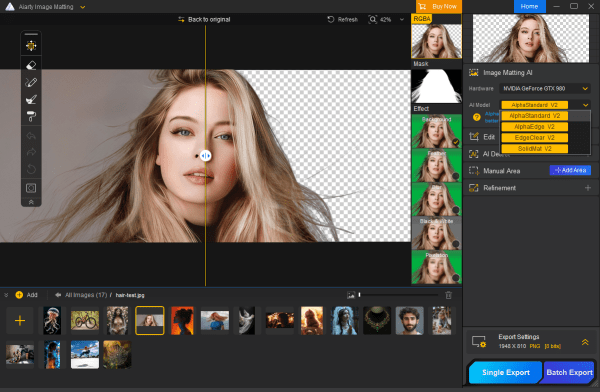
Step 2: Choose Your AI Model
Aiarty offers four specialized AI models to match your subject:
- AlphaStandard V2: For hair, lace, and semi-transparent edges.
- EdgeClear V2: For sharp, detailed subjects like jewelry or wildlife.
- AlphaEdge V2: For mixed edges needing both softness and clarity.
- SolidMat V2: For solid objects like furniture or gadgets.
Select the model that fits your needs, and then click Start to launch AI reference.
Step 3: Refine (If Needed)
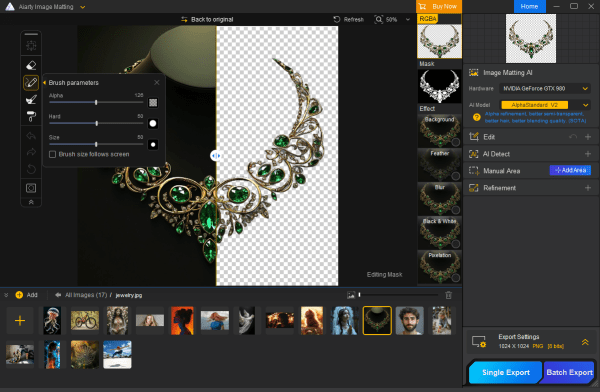
Not quite perfect? Use Aiarty’s smart brushes to tweak edges or restore details:
- Eraser Tool: Fix stray hairs or halos.
- Brush Tool: Enhance edges or add softness.
- Dodge/Burn Tools: Adjust lighting for seamless blending.
Step 4: Export and Publish
Once your edit is flawless, export the image as a PNG with transparency or layer it into a new background in the software. Aiarty’s high-quality output ensures your work looks professional, whether it’s for a client portfolio, social media post, or e-commerce listing.
Where Aiarty Shines in Real-World Photography
Aiarty Image Matting isn’t just a tool—it’s a game-changer for photographers across genres. Whether you’re shooting portraits, products, or wildlife, Aiarty solves real-world challenges and unlocks creative possibilities. Here’s how it transforms your workflow.
For Personal Projects & Hobbies
For portrait photographers, delivering studio-quality headshots is now easier than ever. Cluttered backgrounds can ruin an otherwise perfect shot. With Aiarty Image Matting, you can replace messy backdrops with clean, neutral tones or custom designs in seconds. It excels at handling tricky details like frizzy hair, flyaways, or translucent fabrics, ensuring your subject blends naturally into the new scene.
For Professional Creatives
For travel and wildlife photographers, Aiarty Image Matting helps you isolate birds, animals, or landmarks from cluttered foliage or crowds. You can even replace dull skies with vibrant sunsets for a dramatic finish.
Wedding photographers know that every detail matters. From lace veils to tulle skirts, Aiarty ensures flawless edits for semi-transparent fabrics and flowing hair. Batch-process hundreds of ceremony and reception photos in minutes, and create dreamy composites by layering subjects into new scenes.
For E-commerce & Business
If you are a product photographer or a business owner, Aiarty Image Matting is your secret weapon for e-commerce success. Marketplaces like Amazon demand pure white backgrounds, and manually editing hundreds of product shots can be a nightmare. Aiarty delivers crisp, razor-sharp edges for gadgets, jewelry, or furniture, even under challenging lighting. Plus, its batch processing feature lets you edit 3,000+ images in one go. Swap uneven studio backdrops for consistent and client-ready results.
Why Photographers Trust Aiarty’s Tech
Aiarty Image Matting is designed to handle the toughest editing challenges. Here’s why photographers rely on Aiarty for precision, speed, and creative freedom.
Four AI Models for Every Editing Scenario
Aiarty doesn’t rely on a one-size-fits-all approach. Instead, it offers four specialized AI models, each optimized for different types of images.
- AlphaStandard: Perfect for semi-transparent edges like hair, lace, or water. It preserves soft transitions and delicate textures, making it ideal for wedding photographers or portrait artists.
- EdgeClear: Tackles sharp, detailed subjects like jewelry, wildlife, or furniture. It enhances edge clarity while retaining fine details, so your edits look crisp and professional.
- AlphaEdge: Prioritizes edge sharpness over smooth transparency variations. Balances softness and sharpness for mixed-edge subjects, like flowing dresses with intricate lace. It’s the go-to model for fashion photographers or creatives working with layered textures.
- SolidMat: Handles complex image structures for better matting accuracy and detail preservation. Delivers clean, precise cuts for solid objects like gadgets, shoes, or buildings. It’s a lifesaver for product photographers or real estate professionals.

Matting vs. Segmentation
Traditional background removal tools often leave harsh, jagged edges—especially around tricky details like hair, glass, or water. Aiarty Image Matting uses alpha matting, a sophisticated technique that blends edges like a soft brush, not scissors. This means your subjects transition seamlessly into new backgrounds, with no unnatural halos or lost details.
How Aiarty Stacks Up Against Traditional Tools
When it comes to background removal, not all tools are created equal. Here’s how Aiarty compares to traditional options or online background removers across key areas.
Ease of Use: Compared to the steep learning curve of traditional image editors, Aiarty is designed for photographers of all skill levels. No advanced editing knowledge required—just import, click, and refine.
Performance: Photoshop is powerful but time-consuming. Online tools often struggle with accuracy, especially with semi-transparent or fine details. Aiarty Image Matting handles complex edges (hair, glass, water) with AI-powered precision. Delivers natural blends and sharp details in seconds.

Upscaling Capabilities: Aiarty Image Matting comes with an AI Enhance feature to enhance image quality and resolution. With three built-in AI models, you can enhance the original image quality to extreme detail and upscale the resolution by up to 2X. This is a bonus feature you can’t find in most background removers.
Batch Processing: Aiarty Image Matting can edit thousands of images at a faster speed in one go—perfect for weddings, events, or e-commerce catalogs.
Elevate Your Photography with Aiarty
You didn’t become a photographer to spend hours hunched over a computer, wrestling with clunky tools. You became a photographer to create—to capture moments, tell stories, and deliver images that leave clients speechless.
Aiarty Image Matting is here to help you do just that. With its AI-powered precision, batch processing speed, and photographer-first design, it’s more than a tool—it’s your new creative partner. Whether you’re editing hair-flyaway portraits, polishing product catalogs, or crafting dreamy wedding albums, Aiarty handles the tedious work so you can focus on what matters: your art.
Why Wait? Join our Free License Giveaway and start your free trial from today. Your next masterpiece is just a click away.
The post Aiarty Image Matting: Photographer’s Secret to Streamlined and Flawless AI Background Removal appeared first on Digital Photography School. It was authored by Sime.
Geekom A6 Review: Sub-$500 Mac mini Competitor Is Surprisingly Good
Over the last few weeks, I’ve been testing the Geekom A6 mini PC as my main working computer for editing/retouching photos as well as streaming and even gaming, (it’s the first “real” PC I’ve used in more than 15 years so I just had to). While this tiny device is not the fastest or most powerful computer out there, it offers a surprising level of performance at a very easy-to-swallow $449 price.
Learn How a Simple Flash Will Dramatically Improve Your Photos (VIDEO)
Too many photographers avoid using flash because of a misconception that this versatile accessory is overly complicated to master, but today’s quick tutorial from Newcastle Photography College will quickly allay these concerns and inspire you give basic flash photography a try.
Our unnamed Australian instructor demonstrates why “flash photography opens up so many other possibilities to us as photographers,” and he provides several inspiring examples to illustrate how. Best yet, it will only take six minutes for you to be convinced. It’s all about understanding why the use of an affordable flash will create eye-catching results that are difficult or impossible to mimic with available light—even when you turn to post processing.

You may be surprised how easy it is to get started, especially with today’s sophisticated and intuitive gear. In fact, reading the instruction manual and engaging in a bit of experimentation is often all it takes. That’s why this eye-opening video is less about specific flash techniques than it is an encouragement for you to see what’s possible.
The foregoing holds true whether you’re shooting indoors in dim light or out in the field where a flash can help stop action or provide a little bit of fill that can make a big difference in macro shots, environmental portraits , and more. As our instructor says, ‘in this video I’ll show you a variety of ways that you can take advantage by spending a little time to learn flash lighting.”

In essence this is all about deciding not to restrict your creative possibilities by giving supplemental lighting a try, So here’s the bottom line: If there’s a flash gathering dust in the back of your closet, pull it out (along with the instructional manual) and look at this helpful accessory with curiosity rather than trepidation.
Or go out and spend a few buck acquiring an automatic TTL flash that’s designed specifically for whatever camera you use most. Trust us: you’ll be very glad that you did. Then check out the Newcastle Photography College YouTube channel where you find a variety of other helpful explainers.
And speaking of solving difficult lighting situations, we encourage you to watch a tutorial we featured with another accomplished educator who demonstrates several in-camera techniques that banish image-killing flare and reflections when shooting outdoor photographs against the sun.
Camp Snap Camera Review: Light-Hearted and Nostalgia Packed
Every summer as a child, I attended a day camp during the school break because my single-parent mother had to work to make ends meet. Of course, I wanted to stay home and play video games but I soon began to love learning archery, making new friends, and exploring the wilderness without TV or computer screens to distract me. Many wonderful memories were made and I look back on these times fondly. It is this nostalgia for a simpler and more adventurous time that Camp Snap Photo is trying to market with its popular little 103B Camp Snap camera.


