03312025.WBD.3-2-1_0.jpg

March 31st is World Backup Day

Somewhere out in the vast darkness of cyberspace, millions and millions of precious photographs are wandering aimlessly, homeless and lost forever. Each day, more and more photos join the tens of thousands of socks that were lost in clothes dryers, umbrellas left in restaurants and the car keys that never made it back to the safety of a purse or pocket.

Not to mention the zillions of smiling golf balls banished forever somewhere in rough.

Your data is not safe, but good work habits, starting with a conscientious backup plan, can make data recoverable.

3-2-1 Backup Plan
There’s no surefire strategy to recover lost socks, but you can increase your chances of protecting your photos—and other important data like tax documents, personal correspondence, chili recipes and nonsensical advice you received from a chatbot.

Here’s a logical plan to put your data on the path to safety. (We didn’t create this plan, and we can’t remember who did, but bless them. We endorse it 1000%.)

The 3-2-1 backup strategy: save three copies of your data on two different media types including one off-site copy.

For example, keep one copy on the hard drive in your computer, a second copy on an external drive or NAS (Network Attached Storage) and a third copy in the Cloud.

Grab & Go
We further recommend that you backup critical images, video files, important documents and other data you simply cannot afford to lose on a compact, portable external drive that you can “grab and go” should an emergency arise.

World Backup Day
March 31 has been declared World Backup Day. You know you should backup what’s important, so just do it.

For more information, visit Worldbackupday.com and take the pledge:

“I solemnly swear to backup my important documents and precious memories on March 31st.” #WorldBackupDay


∞ Shutterbug Staff

03282025_ABCDE.Pack_A.jpg

The ABCDE+P Path To Better Photos

How to become a better photographer: A quick tutorial for beginners, and an “Okay, I already do that…” checklist for intermediate amateurs. Advanced hobbyists, you may want to read this, too, just to see if I covered the highpoints.

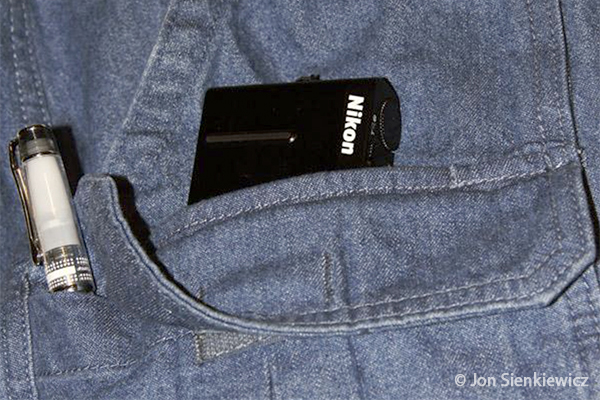
Always Pack a Camera
Sounds trite, but nowadays when so many millions rely on their smartphones for spontaneous snaps, this advice takes on a whole new meaning.

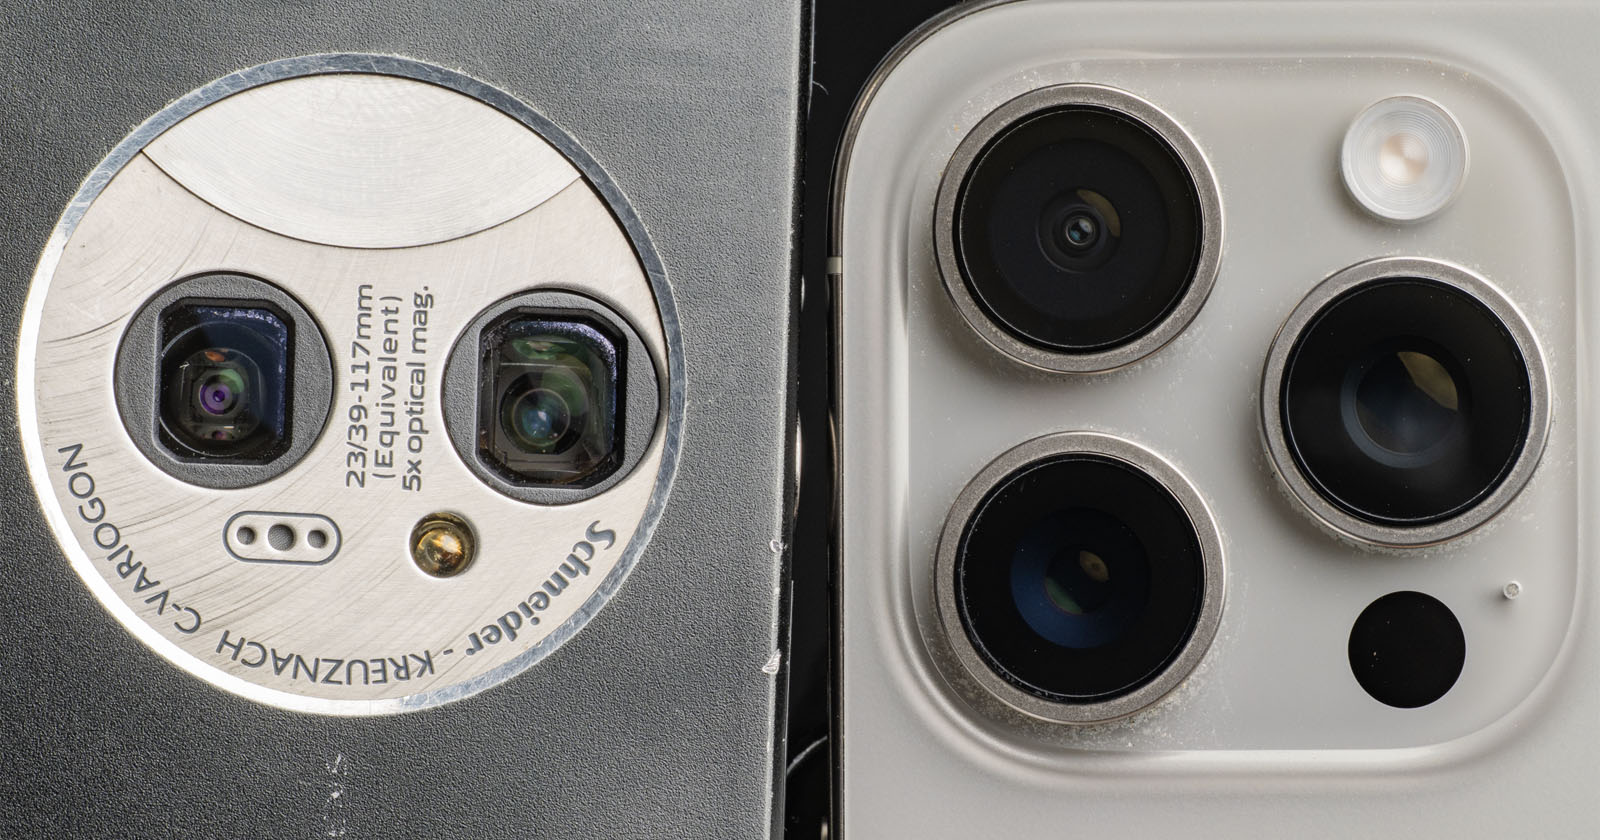
I am not an ASAC (Anti-Smartphone-As-Camera) cheerleader, but I can tell you with absolute certainty that the camera built into your mobile phone will never match the overall versatility of a high-quality mirrorless system camera.

So if you want to grow out of the smartphone stage and develop your image-making skills, buy a real camera. If cost is the only thing preventing you, check our places like MPB and UsedPhotoPro for great deals on used gear. Heck, check them out even if you’re rich—they always have some very cool stuff.

Become a Tripod
Elbows in, wrists locked, head still.

I am incessantly flummoxed by the sight of people taking pictures, often with their cellphone, with their elbows flailing and head bobbing like they’re conducting a dysfunctional high school band. Don’t they know that unsharpness caused by camera movement is the number one killer of great photographs?

And yes, even in the days of built-in Image Stabilization, it’s important to stand still at the moment of exposure if you want a clean shot.
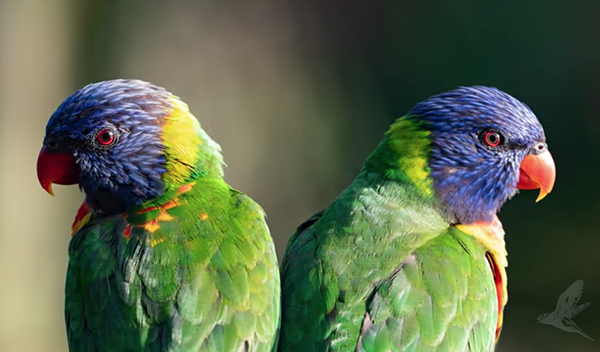
Change Angles
Follow your instincts when you compose an image—but then change your position, distance from the subject and/or camera angle and take another shot. Do this several times if the subject is stationary.

Try both vertical (portrait) and horizontal (landscape) orientations. Later, when you review the images, you may be surprised to learn that you like the backup shots more than the first attempt. This is an important step on path to improving your photographic eye.
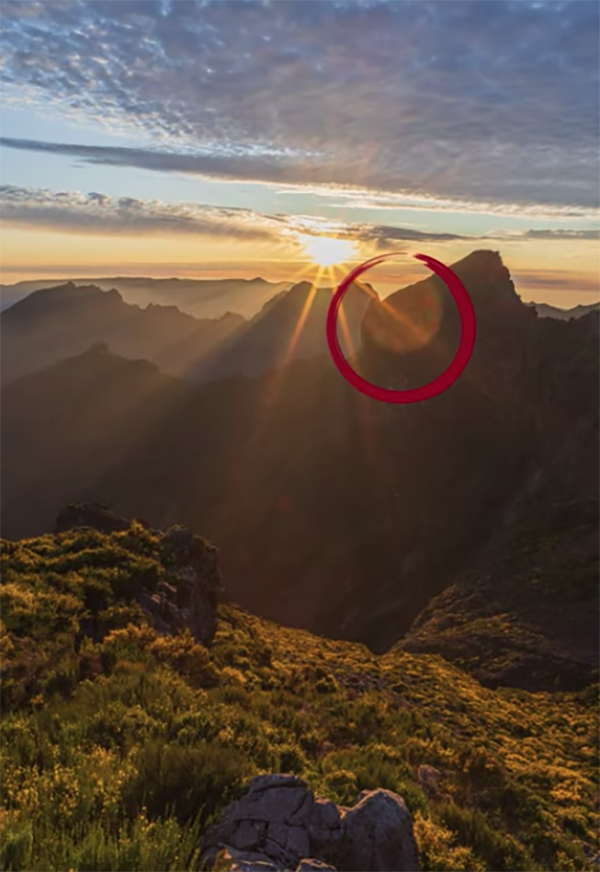
Decenter
Your camera viewfinder will do everything possible to coerce you into framing the main subject smackdab in the middle. Even some autofocus indicators contribute to this heinous plot. After a while, it becomes your normal style.

Resist! Intentionally frame your composition so that the subject is not in the center. You’ll be amazed by how much this simple tip will improve your image making.

Experiment
Explore every “special effects” setting on your camera. If you discover an option you don’t immediately recognize—like the Portrait option on your iPhone, for instance—try it a few times to learn what it does.

Use the wrong White Balance setting purposefully. Make daytime photos look like twilight by misusing the Indoor (or Tungsten) WB setting which is often labeled with a tiny lightbulb icon. If your camera allows you to directly set the Kelvin value, try the lowest and highest possible. Noon daylight is about 5500K. Lower numbers produce warmer results (reddish or orange-brown tones) and higher numbers cooler (bluish).

Explore the Owner’s Manual (I know that’s a chore for many people) and uncover every image-altering option. Soon you’ll settle on a few favorites and your pictures will reveal your personal creative taste.

Post-process
If you really want to become a better photographer, learn one image editing app inside out. If you’re still in the smartphone stage, download Snapseed and explore all of the options. It’s free, easy to use and—believe it or not—it’s the tool of choice for many experienced hobbyists. Snapseed, developed and maintained by Google, runs on Android devices, iPhones and iPads, but not on desktops at this time.

For more info about Snapseed, read: SNAPSEED: The Top FREE App For Mobile Photography (VIDEO).

If you’re not intrigued, go back to bowling or skiing or whatever else you do in your spare time. No shame in that. But if the excitement of watching your images transformed, you’re well on way to becoming a distinguished photographer.

Folks with elite-level potential should try the free smartphone version of Adobe Photoshop, the premier image editor. Read more about it here: Photoshop Phone Home.

Become a Member of the Shutterbug Community
Register for a free account. Sign up for our newsletter. Spend five minutes (or less) uploading your best shots once every week or so. Potentially become a Shutterbug Photo of the Day winner. Enjoy viewing the fantastic work being done by thousands of photographers all over the world—and add your images to the enduring collection.

—Jon Sienkiewicz

1S32825_0.png

5 Pro Tips for More Creative Bird & Wildlife Photos (VIDEO)

Most of the nature photography tutorials we post concentrate on gear, camera settings, and other technical aspects because these are absolutely essential when photographing birds and other wildlife subjects. Today’s video from Flying Parrot Photography is an interesting departure because it sets aside the technical stuff and concentrates on creative considerations instead.

Our instructor Sonia is an Australian pro who admits to being “obsessed” with photographing our feathered friends, and the tutorials she posts are designed to help you make the most of your time in the field by boosting your confidence is all situations. This six-minute episode presents “five techniques to add to your practice, flex your creative muscles, find new inspiration, and create unique, engaging photos.”

Sonia begins by encouraging you to take an abstract approach so that your imagery stands out from the crowd. One way to do this is by zooming in tight, “leaving out certain peripheral details and allowing viewers to fill them in with their imagination.” Concentrating on interesting textures, forms and colors will enable you quickly grab attention by surprising everyone who looks at your work.

Taking the opposite approach by incorporating the landscape in an image can also be quite effective. Here she demonstrates how “bringing the background into the foreground and thinking like an artist painting a scene” will create powerful photos when a bird is just part of the overall story. This method involves looking for eye-catching elements that complement your primary subject.

The concept of symmetry is another powerful tool for creating compelling compositions. Symmetry can often be found in water reflections on calm days or in scenes with two birds sitting or flying side-by-side. She notes that this is the perfect time to center your subjects and ignore the familiar rule of thirds. And sometimes a single bird in flight, facing the camera with wings spread wide, creates a very engaging symmetrical look.

Sonia also illustrates that monochrome images can really shake things up because most bird photographers strive for rich, vibrant colors. You’ll also learn how introducing a man-made element can be very effective—especially when photographing birds in the urban environment.

There’s a lot more to learn about capturing captivating images of birds on the Flying Parrot Photography YouTube channel.

And on a related note, be sure to watch a tutorial we featured with another expert bird photographer and image-editing expert who reveals several shooting and post-processing techniques that will guarantee that your high-ISO nature and wildlife photographs will never be noisy again.

1JS32825.png

Avoiding Image-Killing Flare & Reflections When Sun Hits Your Lens (VIDEO)

Are you struggling to avoid unsightly flare and unwanted reflections from spoiling landscape photos when the sun hits your lens? If so, the video below from master photographer Jan Smid will quickly help resolve this common problem.

Smid is a master photographer who has received over 300 prestigious medals and awards from international competitions in Tokyo, Paris, Los Angeles, London, and elsewhere across the globe. He summarizes today’s 10-minute tutorial like this: “We’ll walk you through practical tips and techniques for managing lens flare and reflections in landscape images, both in the field and during post processing.”

His time-proven techniques and Photoshop strategies are guaranteed to help you achieve clear stunning images every time —whether you’re photographing sunrises, sunsets, side-lit photos, or scenes with reflective surfaces like water on a lake or pond. These common distractions can easily spoil a photo by introducing color shifts, reducing contrast,  and adding ugly color artifacts.

Smid says his methods are both “simple and 100% effective for removing flare when shooting against the sun,” and he begins by describing two types of flare; one that’s immediately visible on the camera’s display, and another that’s “much more dangerous” because it’s difficult to discern.

Smid demonstrates several in-camera techniques for getting the job done in the field, and his first recommendation is to always make sure your lens is outfitted with a proper hood. This practice isn’t always effective with wide-angle lenses, however, because the hoods they require are typically too shallow to provide sufficient protection.

He also suggests that you try a quick experiment by shooting two versions of the same scene; one with a hand hand covering the sun—taking care that your fingers don’t appear in the frame. Then it’s easy to combine both images in Photoshop to achieve the best of both worlds. He describes a few other image-editing tips that are worthy of attention.

The foregoing is barely a taste of everything you’ll learn, which includes a foolproof method for eliminating flare in panorama photos, straightforward exposure-bracketing techniques, and much more. Be sure to visit Smid’s popular YouTube channel once the video concludes where you’ll find many more how-to lessons for shooting in the field.

And don’t miss an earlier tutorial we featured with another notable pro who demonstrates why colors in outdoor photographs don’t resemble what you saw through the viewfinder and a quick post-processing trick for fixing them in Lightroom.

WORLD-BACKUP-DAY-2.png

World Backup Day 2025

The post World Backup Day 2025 appeared first on Digital Photography School. It was authored by Sime.

UPDATE: Because the team at Synology have given us one of their BRAND NEW models for this giveaway, we have a couple of weeks to wait for the NAS, and, as such, we are extending the deadline for entry to April 11th – Follow, Comment, Share and Tag! ENTER HERE

A lesser known celebration for a day that, as a photographer / content creator / filmmaker / regular person that takes photos of their kids on their phone.. (everyone!) SHOULD be at the top of your calendar! World Backup Day! – March 31st!

Enter Here: https://www.instagram.com/p/DHu3tVXNE_x/

World Backup Day 2025

March 31st each year, we all encourage each other to BACKUP! In my case it’s to make sure my directly attached external drive is backed up to my NAS (I’ve been using Synology NAS for years, and that’s how we arrived here!) and, I also use it to remind my wife to do her once-a-year backup of her ageing laptop! (trust me, I try…)

This year, we’ve joined forces with the team at Synology to award one lucky person with a FANTASTIC 4-Bay Synology NAS and matching Synology Drives to make sure that they’re BACKED UP properly going forward!

All you need to do to enter is to head over to our Instagram post linked below…

Enter Here: https://www.instagram.com/p/DHu3tVXNE_x/

Losing your photo archive because you stored it all on your laptop and some clumsy mate spilled his coffee in your keyboard? The dog chewed it? Aliens… The list goes on! But with it being SO easy to back up these days, what’s stopping you?

Here’s an article I did on using one of the small Synology TWO BAY NAS to manage your photo archives.

29% of data loss is caused by accidents! Don’t be part of the 29%, click here, enter now.

Terms & Conditions for Instagram Giveaway

Eligibility: Open to legal residents of Australia aged 18 and over. No purchase necessary.

Entry Period: Starts March 28, 2025 and ends on April 4th at 12:59 PM [Melbourne zone].

How to Enter: Follow @digitalps and @synology.official on Instagram, like the giveaway post, and comment as per instructions.

Winner Selection: A random draw will take place on April 5th at 1:00 PM

Prize: One Synology 4-Bay NAS with matching hard disk drives. Prize is non-transferable, no cash alternative.

Winner Announcement: The winner will be announced on @digitalps Instagram and contacted via DM. The winner must respond within 72 hours to claim the prize. We will NOT message you from any other account or DM you from any other account – anyone else claiming you’ve won is a scammer and should be… well, use your imagination, I don’t like scammers…

Shipping & Delivery: The prize will be shipped to the winner at no cost within Australia. We are not responsible for any customs fees or lost packages.

Disqualification: We reserve the right to disqualify entries that do not follow the rules or are deemed fraudulent.

Not Affiliated with Instagram: This giveaway is not sponsored, endorsed, or administered by Instagram.

The post World Backup Day 2025 appeared first on Digital Photography School. It was authored by Sime.

1JH32725.png

9 Must-Try Lens Filters for Photos and Videos (VIDEO)

Some photographers, like today’s instructor Joris Hermans, simply can’t stop themselves from purchasing lens filters in the hope that these affordable accessories will protect their expensive lenses, create unique effects, help modify light, and magically add impact to the photos and videos captured outdoors.

As time goes by, a few of these filters become trusted companions, others are only employed on rare occasions, and some are set aside and never see the light of day more than once. If you’re suffering from this strange form of Gear-Acquisition Syndrome, please accept our heartfelt condolences.

To complicate matters, some of us purchase the same filter in various sizes to accommodate a variety of regularly used lenses, and this is where things can get expensive—to say nothing of cluttering up your bag. Hermans sets aside his filter obsession for the next 10 minutes as he takes a close look at nine filters he says everyone should try.

Hermans describes the intended purpose of his top picks and provides a quick discussion of how each can best be used to fulfill specific goals. His first favorite is the widely used Neutral Density (ND) filter that’s a favorite among landscape photographers, and this one not only comes in various sizes but in different strengths as well. In simple terms, think of ND filters as “sunglasses for your camera because they enable you to control the amount of light reaching the sensor.”

Another ubiquitous choice is the polarizer which can be helpful for several reasons. By turning it’s rotating front ring you can darken pale blues skies, increase vibrance and saturation, and remove or reduce unwanted reflections on not-metallic surfaces like glass, water, and the like. This filter can be more or less effective depending upon your angle relative to the sun, and it’s important not to take things too far because a total lack of reflections can impart a lifeless  look to a shot.

Mist filter are often used by landscape and nature photographers to imbue images with a moody or “atmospheric” appearance that can be quite intriguing—even when shooting on clear days. The extremely dark solar filter, on the other hand, serves one primary purpose: namely, photographing the sun.

By following Hermans’ advice you’ll save some cash by avoiding unnecessary temptations while enhancing your outdoor images in various ways. Be sure to visit his instructional YouTube channel for more tips, techniques, and worthwhile gear recommendations.

Another quick way to modify the appearance of your images involves using presets during post processing, and we recently posted a story offering a free pack of these timesaving tools. So be sure to take a look and take advantage of this time-limited offer.