AD_4nXeTu5aKJeTpdAxpVqOlum4kN--0OR8UlljByg-AkFzdP_sGjLkMBUJp-xwryM1SDJ80jTmkgYTxoFgbpMuA14cSLoNaUImUZSldyf_o6fdoDofMgywbuwDJGznLJoZiS0OOOC1ulmeX5XIMKA1KpL0

Unlock Cinematic Brilliance: Elevate Your Footage with VideoProc AI Video Upscaler (Easter Special Inside)

The post Unlock Cinematic Brilliance: Elevate Your Footage with VideoProc AI Video Upscaler (Easter Special Inside) appeared first on Digital Photography School. It was authored by Sime.

Part 1: Introduction 

4K and 8K aren’t just buzzwords—they’re today’s standard for visual storytelling. But what happens when your footage doesn’t measure up? Maybe it’s an old SD clip from a documentary project, now painfully grainy on a modern screen. Or a once-in-a-lifetime wedding moment, ruined by dim lighting and noise.

These aren’t just “what-ifs”—they’re real frustrations. Fast-moving shots (think sports or wildlife) lose critical detail. Telephoto lenses introduce soft edges. Even macro videographers, who rely on capturing delicate textures, fight against lens limitations.

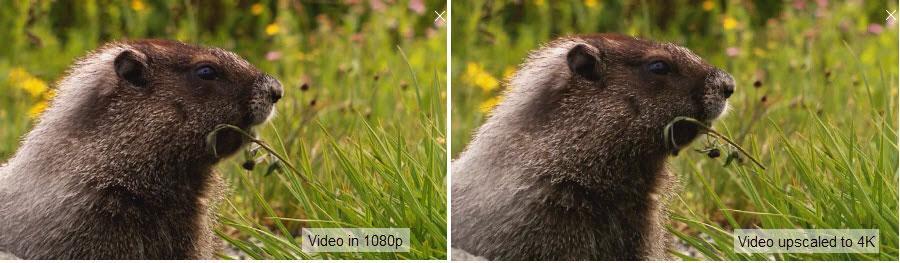
That’s where AI video upscaling comes in. It’s not just about adding pixels—it’s about restoring what your footage was meant to be. Whether you’re rescuing old tapes, fixing low-light shots, or sharpening macro details, tools like VideoProc Converter AI have gone from “nice-to-have” to essential.


Part 2: Why VideoProc Converter AI? The AI Video Upscaler You Can Trust

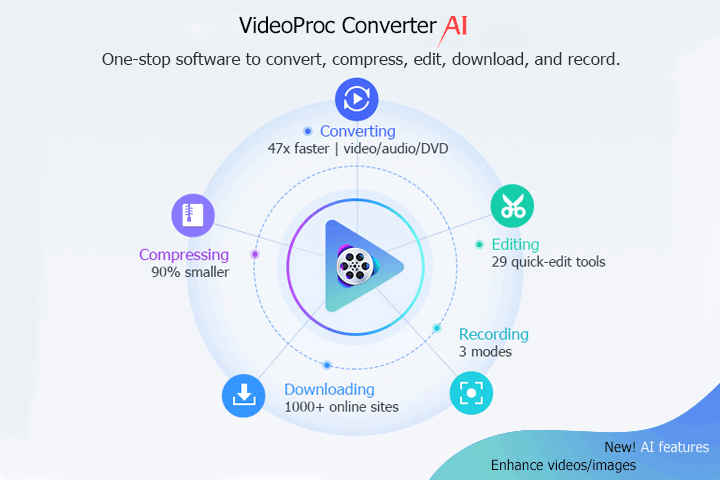
When quality and efficiency matter, VideoProc Converter AI is the definitive solution for videographers and filmmakers. Unlike basic upscalers that simply stretch pixels, it intelligently reconstructs footage using advanced AI—preserving authenticity while achieving stunning 4K/8K clarity. Here’s why professionals trust it:

  1. Cinematic-Quality Upscaling

Uses deep learning to analyze and enhance details frame-by-frame, transforming SD/HD to true 4K/8K without artificial sharpening or artifacts. Ideal for restoring old footage or meeting broadcast specs.

Unlock Cinematic Brilliance: Elevate Your Footage with VideoProc AI Video Upscaler (Easter Special Inside)
  1. Smart Artifact Removal

Eliminates compression flaws (blockiness, banding) from streaming rips, DSLR footage, or legacy files—revealing clean, natural textures hidden beneath digital noise.

  1. Dual Denoising Engine

Combats both high-ISO grain and motion blur in low-light scenes (e.g., weddings, concerts), recovering crisp details even in near-darkness.

  1. Frame-Perfect Motion Handling

Ensures smooth slow-motion by compensating for dropped frames or blur in fast-action shots (sports, wildlife), avoiding the “jelly effect” of cheaper tools.

  1. GPU-Optimized Speed

Renders 8K in real-time by leveraging multi-GPU power—cutting processing time by 75% compared to CPU-based alternatives.

? See it in action: Official Video Demo?


Part 3: Easter Special: Elevate Your Toolkit Without Breaking the Bank

Good video software shouldn’t cost a fortune. VideoProc Converter AI delivers pro-level results without the Hollywood price tag.

Your  Options:

  • Annual Plan ($25.95): Full access to every feature—from AI upscaling to stabilization and colorization—for a full year. Perfect if you prefer flexibility.
  • Lifetime License ($45.95): A single payment unlocks permanent access. The go-to choice for studios and serious creators.

EASTER SPECIAL ALERT! ?
For a limited time, upgrade to the Lifetime License for 3 devices at just $39.95—that’s 30% off the regular multi-device price.

? Claim This Exclusive Deal Now

This isn’t just software—it’s a long-term solution for your workflow. The offer won’t last, and neither should your compromise on quality.

Bonus Tip

Need to polish the photos too? Grab Aiarty Image Enhancer (1-Year License included) to fix blurry portraits, restore old scans, and prep images for print.


Part 4: From Grain to Glory: How to Upscale Like a Pro

VideoProc Converter AI doesn’t believe in one-size-fits-all solutions. That’s why it offers four specialized AI models, each engineered to tackle specific enhancement challenges with surgical precision:

1. Motion Enhancement Mode
Your secret weapon for fast-paced content. It analyzes movement patterns to reduce motion blur and rolling shutter artifacts – perfect for smoothing out sports plays, drone footage, or wildlife action shots.

2. Film Restoration Mode
A time machine for vintage footage. While upscaling, it preserves the authentic grain structure of 16mm/35mm film while removing scratches and noise – ideal for archivists and period piece creators.

3. Anime Optimization Mode
The animator’s ally. It applies intelligent anti-aliasing to clean up jagged edges in 2D animations and hand-drawn art without softening distinctive artistic lines.

4. Portrait Refinement Mode
The interview specialist. It enhances facial details – sharpening eyes, refining skin texture, and maintaining natural tones for documentary subjects or talking-head footage.

Your Step-by-Step Upscaling Guide:

Step 1: Download and Install VideoProc Converter AI 

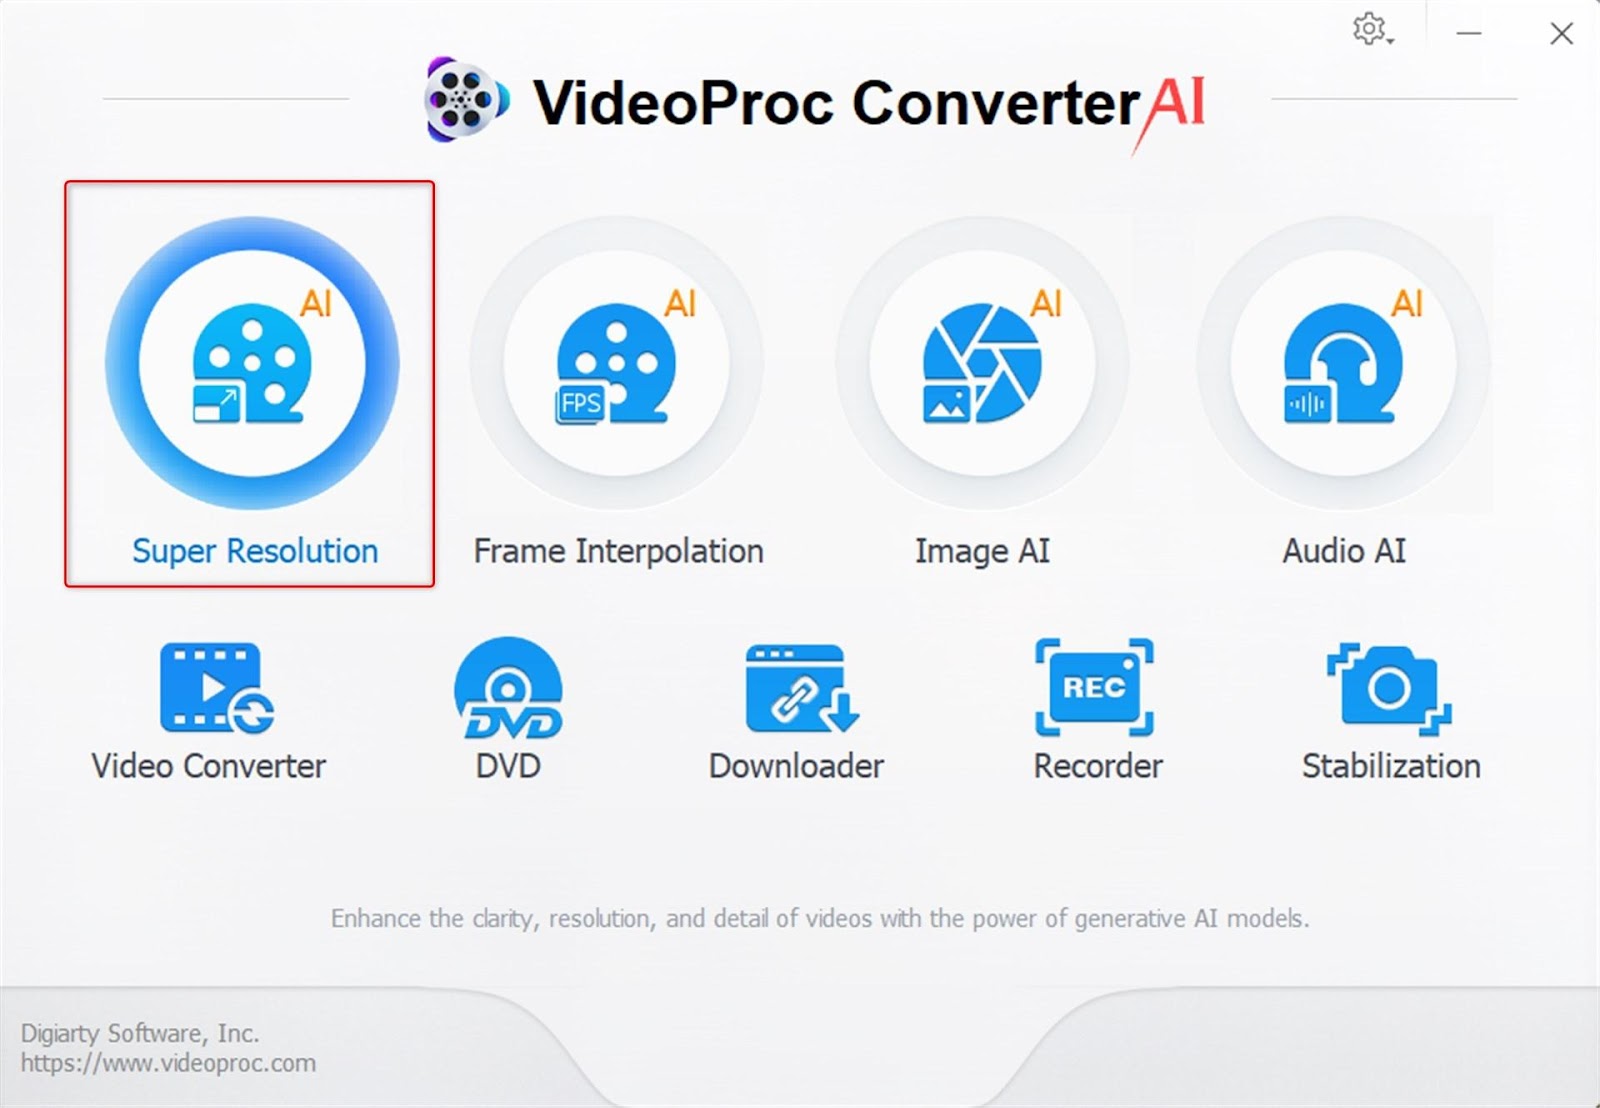
Install VideoProc to your PC or Mac and run it. Select the Super Resolution icon.

Unlock Cinematic Brilliance: Elevate Your Footage with VideoProc AI Video Upscaler (Easter Special Inside)

Step 2: Import videos and Select Your AI Model
Drag and drop your video file directly into VideoProc’s clean interface – it supports everything from vintage. Click the “AI Model” dropdown and choose the mode that matches your content type.

Unlock Cinematic Brilliance: Elevate Your Footage with VideoProc AI Video Upscaler (Easter Special Inside)

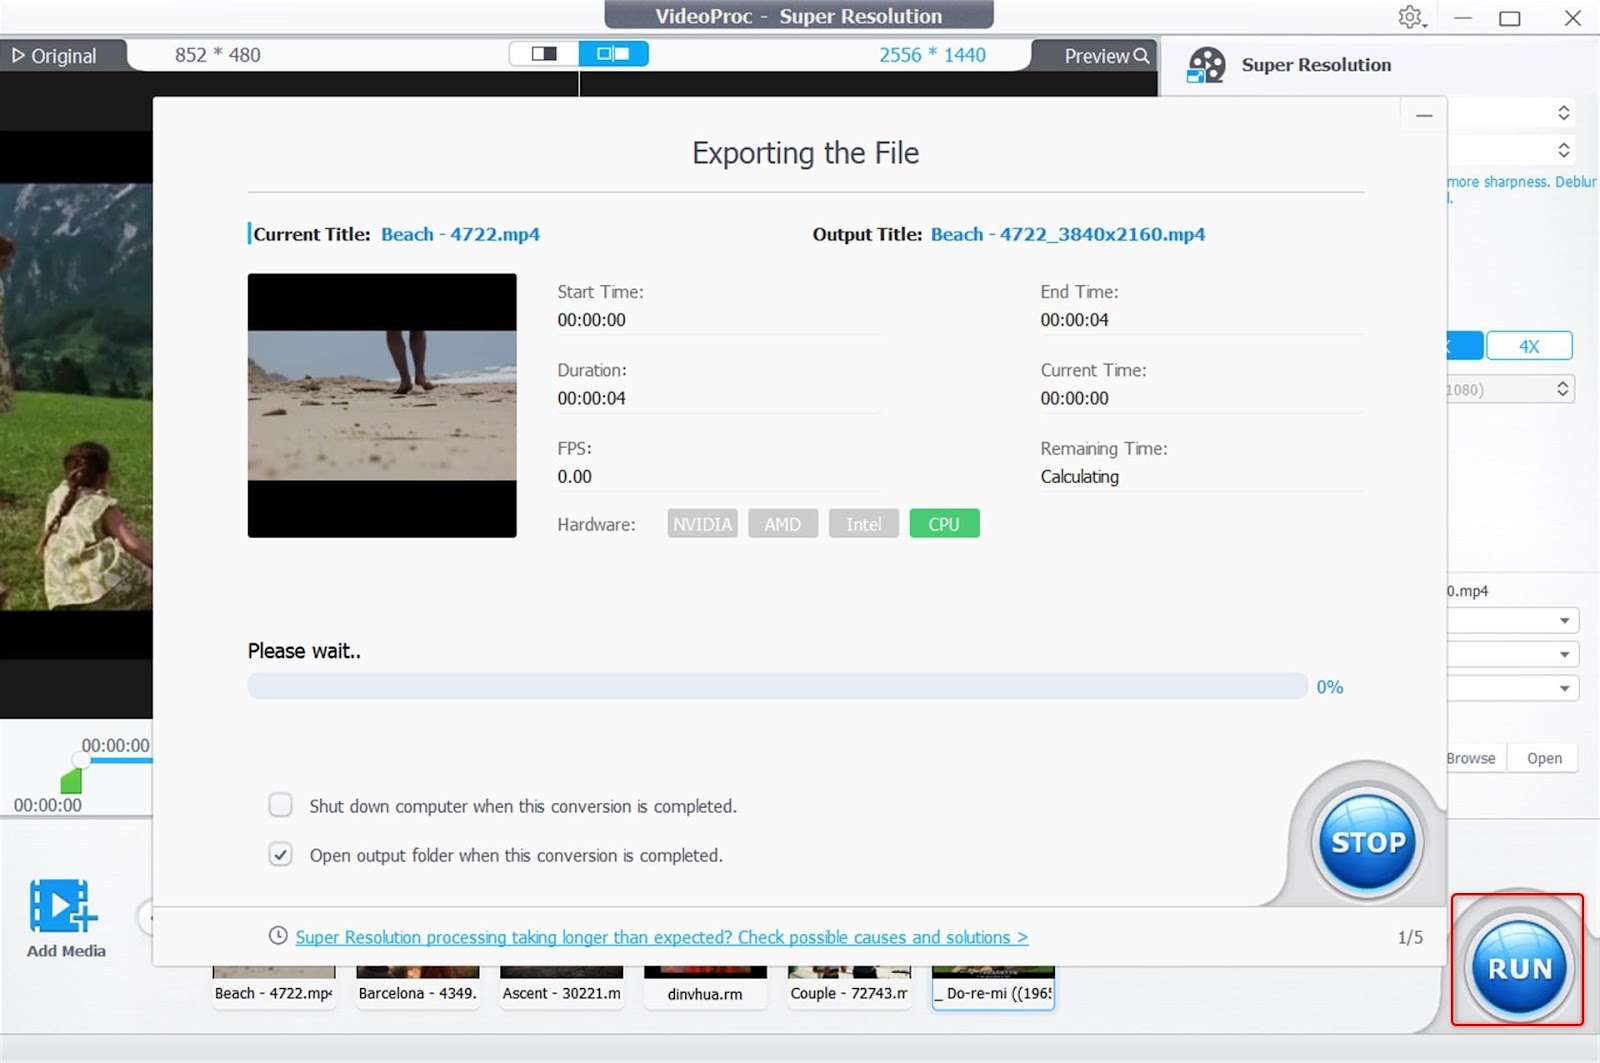
Step 3: Set Output Parameters
Specify your target resolution (up to 4K), video/audio codec, and format. Once you’re satisfied with the results, click the RUN button to export.

Unlock Cinematic Brilliance: Elevate Your Footage with VideoProc AI Video Upscaler (Easter Special Inside)

Part 5: Beyond Upscaling – Your Complete Video Toolkit

VideoProc Converter AI isn’t just an upscaler—it’s an all-in-one powerhouse packed with professional tools that streamline your entire post-production workflow. Here’s what else you can do:

  • AI Frame Interpolation

Transform 24/30/60FPS footage into ultra-smooth 120-480FPS slow motion—perfect for cinematic B-roll or reviving vintage clips without expensive high-speed cameras.

  • Video stabilization

 Make handheld camera footage steady, Optimize wobbles in low-light environments, Eliminate shakes in drone videos, Fix shaky GoPro footage, and stabilize jitters from moving objects.

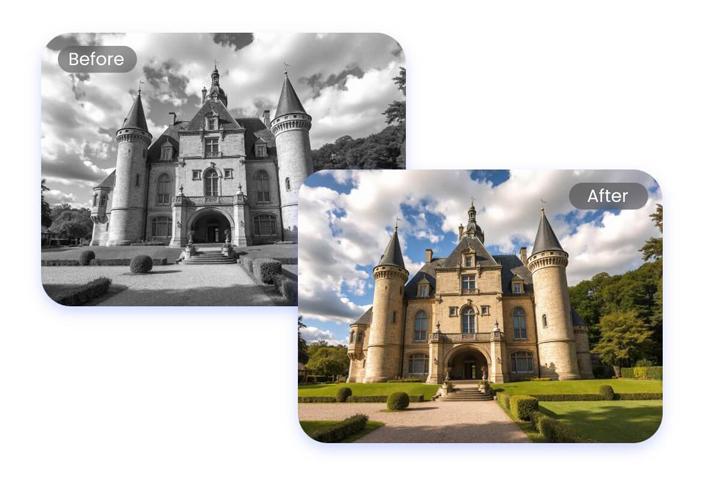
Turn Monochrome Photos into Colorful Images, breathe new life into black-and-white photos by adding vibrant colors, transforming old and faded heritage images into true-to-life modern pictures with restored and sharpened details.

Unlock Cinematic Brilliance: Elevate Your Footage with VideoProc AI Video Upscaler (Easter Special Inside)
  • Universal Format Conversion

Support 370+ Input Codecs, 420+ Output Formats, convert 4K/HEVC/C-log/MP4/ XAVC-S/MKV 420+ formats for smooth playback.

  • Smart Compression

Reduce file sizes by up to 90% (e.g., 2GB ? 0.17GB) without sacrificing quality—ideal for email sharing or storage optimization.

  • Quick Edits & DVD Digitizing

Crop, resize, rotate, or watermark videos in seconds. Plus, rip DVDs to MP4/ISO/MP3 with 1:1 quality preservation.


Part 6: Don’t Miss This Upgrade

VideoProc Converter AI revolutionizes your workflow with intelligent upscaling that transforms ordinary footage into extraordinary 4K/8K content – preserving authentic details through specialized AI modes while delivering lightning-fast processing. Whether you’re restoring archival footage, perfecting slow-motion sequences, or meeting broadcast standards, this all-in-one solution gives you the precision and efficiency professionals demand.

Ready to future-proof your creativity?
Claim Your Discount Now!  Get the lifetime multi-device license (3 workstations) for just $39.95 – a 30% savings! This deal won’t last forever. 

The post Unlock Cinematic Brilliance: Elevate Your Footage with VideoProc AI Video Upscaler (Easter Special Inside) appeared first on Digital Photography School. It was authored by Sime.

1AN41725.png

This New AI-Powered ACR Remove Reflections Tool is a Gamechanger! (VIDEO)

The task of removing image-killing reflections, like in photos shot with a window within the frame, used to be a somewhat arduous chore. But fortunately those complications are now a thing of the past thanks to the powerful new AI-powered Remove Reflections tool in Adobe Camera Raw (ACR).

This timesaving explainer comes to us from the folks at PHLEARN, a popular YouTube channel that founder Aaron Nace describes as “the number one Photoshop and Lightroom online resource.” Be sure to download his demonstration image with a link in the description beneath the video so you can follow along as Nace demonstrates the easy-and-effective procedure.

Nace begins with a casual portrait of himself on the street in San Francisco. Unfortunately there’s greenery and other elements behind the camera position that are reflected in the store window that serves as a backdrop for the image. As the lesson unfolds you will quicky contemplate other applications for this tool beyond reflections on glass—like those involving ponds and lakes, puddles, and other reflective surfaces.

In less than four minutes you’ll learn “how to activate ACR’s Technology Preview and utilize the intuitive Reflection slider to reveal a clear view behind the window.” He provides other examples and illustrative photos to make your understanding of this exciting new tool as clear as glass.

Nace says he’s particularly excited about this tool because it actually provides you with choices. For example, “You can choose to just see a reflection and nothing else or reveal the contents inside of the window. It’s amazing and available right now.”

It important to note that this technique only works with Raw files, i.e. Jpegs are not supported at this time. Nace opens a DNG image in ACR, then navigates to Technology Previews where you can check a box to enable the New AI Features and Settings Panel. This includes options like Generative Expand, Reflection Removal, and Denoise.

Another heads up is that once you’ve checked the aforementioned box, it’s necessary quit and relaunch Photoshop for yourr selection to take effect. As for practical tips on using the Remove Reflections tool itself, we’ll step aside and let you watch Nace demonstrate how quickly it works.

The PHLEARN YouTube channel has over two-million fans, and you might want to take a look at what’s available and subscribe.

We also recommend watching a tutorial we featured with another post-processing expert who demonstrates how to embellish nighttime cityscape photographs in Lightroom Classic with pro tips from the streets of Paris.

1N41725.png

DEPTH OF FIELD: Don't Believe Everything You've Heard (VIDEO)

The concept of depth of field describes one of the most important determinants of how your outdoor photographs will appear. If you’ve ever captured the identical scene with two different f/stop settings, you at least have an inkling of how this works.

But here the rub: Some photographers fall for the popular misconception that they should always shoot with a wide aperture to achieve a soft background that separates the main subject from surrounding areas with the frame. This tutorial from the Newcastle Photography College begs to differ by demonstrating an effective, alternative approach.

Our unnamed instructor is an Australian pro who’s determined to pass on the wisdom that he’s accumulated over the past 40 years in the field. He kicks off this 12-minute episode with a warning: “Don’t just follow the crowd by using large apertures and narrow depth of field.”

His point is that we have a wide range of choices with both aperture and shutter speed and it’s your responsibility to explore them and discover what combination works best for just about every image you shoot. With this awareness your photos will display varying amounts of depth and dimension depending upon the exact look you desire.

The bottom line is this: “A greater depth of field may allow you to create a more interesting story with you images.” He admits that this approach takes a bit of some planning and skill, and he walks you through the why and how of getting the job done to perfection.

It also true that “correct” depth-of-field is a very subjective matter because we all have our preferences as to how a scene should look. Or as our instructor says, “I’m not asking that you blindly follow my way, just that you keep your mind open to the possibilities of using a sharper foreground and background to enhance the viewer’s experience.”

This straightforward technique is discussed in the context of environmental portraiture, but it also works wonders for all sorts of outdoor photos—be they landscapes, action shots, or nature and wildlife images. It boils down to another way of viewing the world around us and experimenting with what’s revealed in the demonstration images below.

Be sure you click “View on YouTube” in the black box below. The Newcastle Photography College YouTube channel is a great source of how-to videos that are sure to enhance your abilities, so be sure to take as look.

And don’t miss our recent primer on photographing fast-moving subjects that will help you determine whether to freeze the peak of motion or intentionally blur the subject to create a unique representation of speed.

https://youtube.com/watch?v=g7Y9DPP5LZg

1PS41725.png

Quick Image-Editing Tricks That Every Photo Editor Should Know (VIDEO)

We’re all looking for ways to improve our image-editing workflow by getting the task done faster while achieving great results. Today’s tutorial does exactly that by revealing five Photoshop tips and tricks that you’ve likely never tried.

The eye-opening episode is the 15th installment in a unique series from the Easy Photoshop YouTube channel that specializes in how to videos that unlock alternative post-processing techniques that are easy to employ. Today you’ll learn five simple-and-effective Photoshop tricks in barely five minutes.

This lesson is different than most because it proceeds without dialogue, so all you have to do is sit back and watch how to put this handful of Photoshop techniques to work. Our unnamed instructor based in Pakistan summarizes his goal in the description beneath the video it like this: “Whether you’re fixing tricky edits, improving workflow, or just discovering hidden features, these tips will make your editing easier and faster.”

While these five “game-changing” tips are straightforward and powerful they’re frequently overlooked, even by experienced users. And we’re quite confident that you’ll want to add them to your Photoshop bag of tricks.

Because this is a visual tutorial we’re not going to intrude with any more words of our own. Just sit back, launch the video, and learn what you’ve been missing. Then head over to the Easy Photoshop YouTube channel for more post-processing advice. You’ll also find previous episodes in this particular series.

And be sure to watch a tutorial we featured recently from another image-editing expert who demonstrates the power of Adobe Camera Profiles and why using them for post-processing in Lightroom delivers far more control for achieving photographs with the specific effect you desire.

1EB41725.png

Beginners Guide to On-Camera Flash: It's Really Quite Easy (VIDEO)

Last month we brought you an inspirational video demonstrating why a simple flash can greatly improve all sorts of photographs made indoors or out. It was an illustrative piece without much technical information. Today’s tutorial covers the how in simple terms that beginners can understand.

Instructor Emma Birman is a professional wedding photographer who knows how important an affordable flash can be. She presents this 14-minute guide in the context of her specialty but everything you’ll learn is applicable to other genres as well. And like in last month’s video, her primary goal is to help you overcome a needless fear of flash.

As she says, “I’ll guide your through everything you need to know for mastering on-camera flash to create stunning photos.” She does this by discussing why different types of light impact how you proceed, lighting terms you should know, comparing results between on-camera and off-camera flash, and the pros and cons of each.

The comprehensive video also delves into an exploration of “diffusion,” and Birman’s gear recommendations. But the definitions come first so you won’t be confused. She explains the the meaning of “ambient light,” that the term “strobe” is just another word for flash, and the concept of “TTL” flash. Anther term you need to understand is “synch speed.”

With all that out of the way Birman moves on to practical advice for making a flash your friend. Sitit down with pen and paper in hand so you can jot down a few notes for future reference, then click the “play” button to begin your journey into simple flash photography with confidence.

Once the video concludes head over to the Aftershoot YouTube channel where there’s much more to learn about shooting techniques, photo equipment options, and straightforward post-processing methods.

And don’t forget to watch the video mentioned above with an Australian pro who provides several compelling examples of how the use of flash can create eye-catching images that would be difficult or impossible to mimic with nothing but ambient light.