1CM41025.png

Why You Should Use Photoshop's Adjustment Layers to Fine-Tune Your Edits (VIDEO)

This tutorial from the PHLOG Photography YouTube channel is different from others they share that typically take a deep dive into a single technique from beginning to end. Instead, the goal of today’s episode is to provide an overview of Adjustment Layers in general and demonstrate why they should play a prominent role in your everyday Photoshop workflow.

Instructor Christian Mohrle is one of Germany’s finest landscape photographers, and his post-processing videos are second to none. This 10-minute episode describes the concept behind Photoshop’s Adjustment Layers, where they’re located within the workspace, the different enhancements they enable you to make with precision, and the best ways to use them.

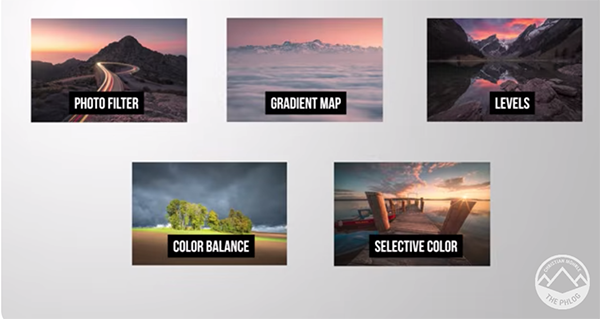
While Mohrle doesn’t concentrate on any one specific technique he does share his five favorite Adjustment Layers which include Photo Filter, Gradient Map, Levels, Color Balance, and Selective Color. He puts it like this: “Adjustment Layers are a great way to add some final retouching on your images. I love using them as a last step in my editing process to apply very fine, distinct changes.”

Mohrle provides an overview of how these layers can enhance colors and tones without changing pixel value. In other words, these are non-destructive adjustments. This means you have plenty of freedom to experiment with the changes until you’re completely satisfied with the outcome.

You’ll find a variety of icons near the bottom of Photoshop’s Layer panel. Mohrle shows you where to click to access the tools which are divided into groups. Mohrle explains why the upper options are of less interest to landscape photographers. The lower group is where things get interesting because “here we have the Adjustment Layers affecting the tones of your images that can be used to change brightness and contrast.”

Then there’s s bunch of Adjustment Layers targeting colors that enable you to change saturation, specific colors, and overall color balance. The remainder of the 10-minute video is devoted to exactly how Mohrle’s five favorite Adjustment Layers work, and you may find that this handful of techniques is all you really need.

After the video concludes be sure to check out the popular PHLOG Photography YouTube channel where there are many more instructional videos for anyone who shoots in the great outdoors and wants to edit their photos to perfection.

We also recommend watching another helpful tutorial we posted recently in which a successful British landscape photographer demonstrates three “secret tricks” that anyone can use to capture super-sharp images with any camera and lens.

OM-System-Outdoor-Monster-Curry-Review-Bringing-the-Delicious-Heat.jpg

OM System Outdoor Monster Curry Review: Bringing the Delicious Heat

A camera lens and a box labeled "OM System Curry" are placed on a windowsill. The background shows a blurred cityscape, while the foreground features a "PetaPixel Reviews" banner.

In the camera review game, the continuous grind of lens and camera reviews can get a little monotonous sometimes. But every once in a while, a product comes along that is so innovative and so outside the box that you can’t help but stand in awe. Outdoor Monster represents a moment exactly like this and I had the privilege to test it out for myself.

[Read More]

1MN4925.png

Exposure Bracketing for Beginners: What, When, Why, Where, and How

Exposure bracketing is a powerful technique that enables you to achieve a perfect exposure when shooting in difficult light, like complicated outdoor scenes with a wide range of tones from bright highlights to deep shadows. Today’s comprehensive beginners guide comes to us from The School of Photography (TSoP)—an amazing source of online courses and a leading provider of education to schools and colleges in the UK.

This very helpful Guide reminds us of the old days in journalism school when we learned about the “The Four W’s & the H”—namely, what, when, why and how—because that’s exactly the approach taken today by Mac Newton who just happens to be the head honcho at TSoP. In other words, he explains the concept, when, where and why it’s appropriate, and how the simple settings and adjuments are made.

In basic terms Exposure Bracketing works like this: You capture multiple images of the same scene (usually a sequence of three photos will suffice)—each with slightly different exposure. So you’ll make one shot at a “correct” exposure setting, another one-stop underexposed, and a third that’s intentionally overexposed by a stop.

Once you’ve done the foregoing there are a couple choices. You can either use one of the shots is it looks great or blend all three images later during post-processing to achieve exactly the look your after. Put another way, this technique provides helpful options when it comes to the dynamic range in challenging situations.

The process of Exposure Bracketing dates back to film photography when cameras lacked a rear LCD—making it impossible to preview a frame before snapping the shutter. “So you’d take shots of the scene at a series of different exposures to ensure you ended up with a properly exposed image once you got back to the darkroom.”

Bracketing  works pretty much the same today with the added benefit of an LCD, in-camera settings, and the great power of the digital darkroom. You may want to jot down a few notes as Newton walks you everything from the A to Z of this transformational technique. Then take advantage of everything you’ve learned for shooting in the field and sitting behind the computer.

Be sure to check out the other instructional videos that are available on The School of Photography YouTube channel.

And don’t miss another explainer we featured earlier with what one of our favorite post-processing instructors says are “five huge photo-editing mistakes that that are easy to fix.”